Hello, thank you again for supporting FLUX. It is because of you, we can build this cool stuff.
In this guide, we will walk through the WiFi setting. It should be easy in average cases, but sometimes it's tricky. Therefore, we advise you go through the wifi setting with this guide, and contact us if you encounter any trouble.
[ What you need to know in advance ]
1. If you are using PC and WiFi router, make sure the router doesn't block communications between LAN and WLAN, and make sure your PC and the Delta connect to the same router.
2. FLUX Delta only supports 2.4 Ghz Wi-Fi, and 5 Ghz is not supported.
3. WPA-PSK / WPA2-PSK encryption mode are suggested.
4. Please keep the distance between router and the printer less then 5 meters.
5. If you use "home use" wifi router, turn off the IGMP Snooping. If you using advanced wifi router for business, please ensure the IGMP snooping is turned on.
6. If you first got your machine in Jan - Feb 2016, make sure you've updated FLUX Delta's firmware to at least v1.0b20.
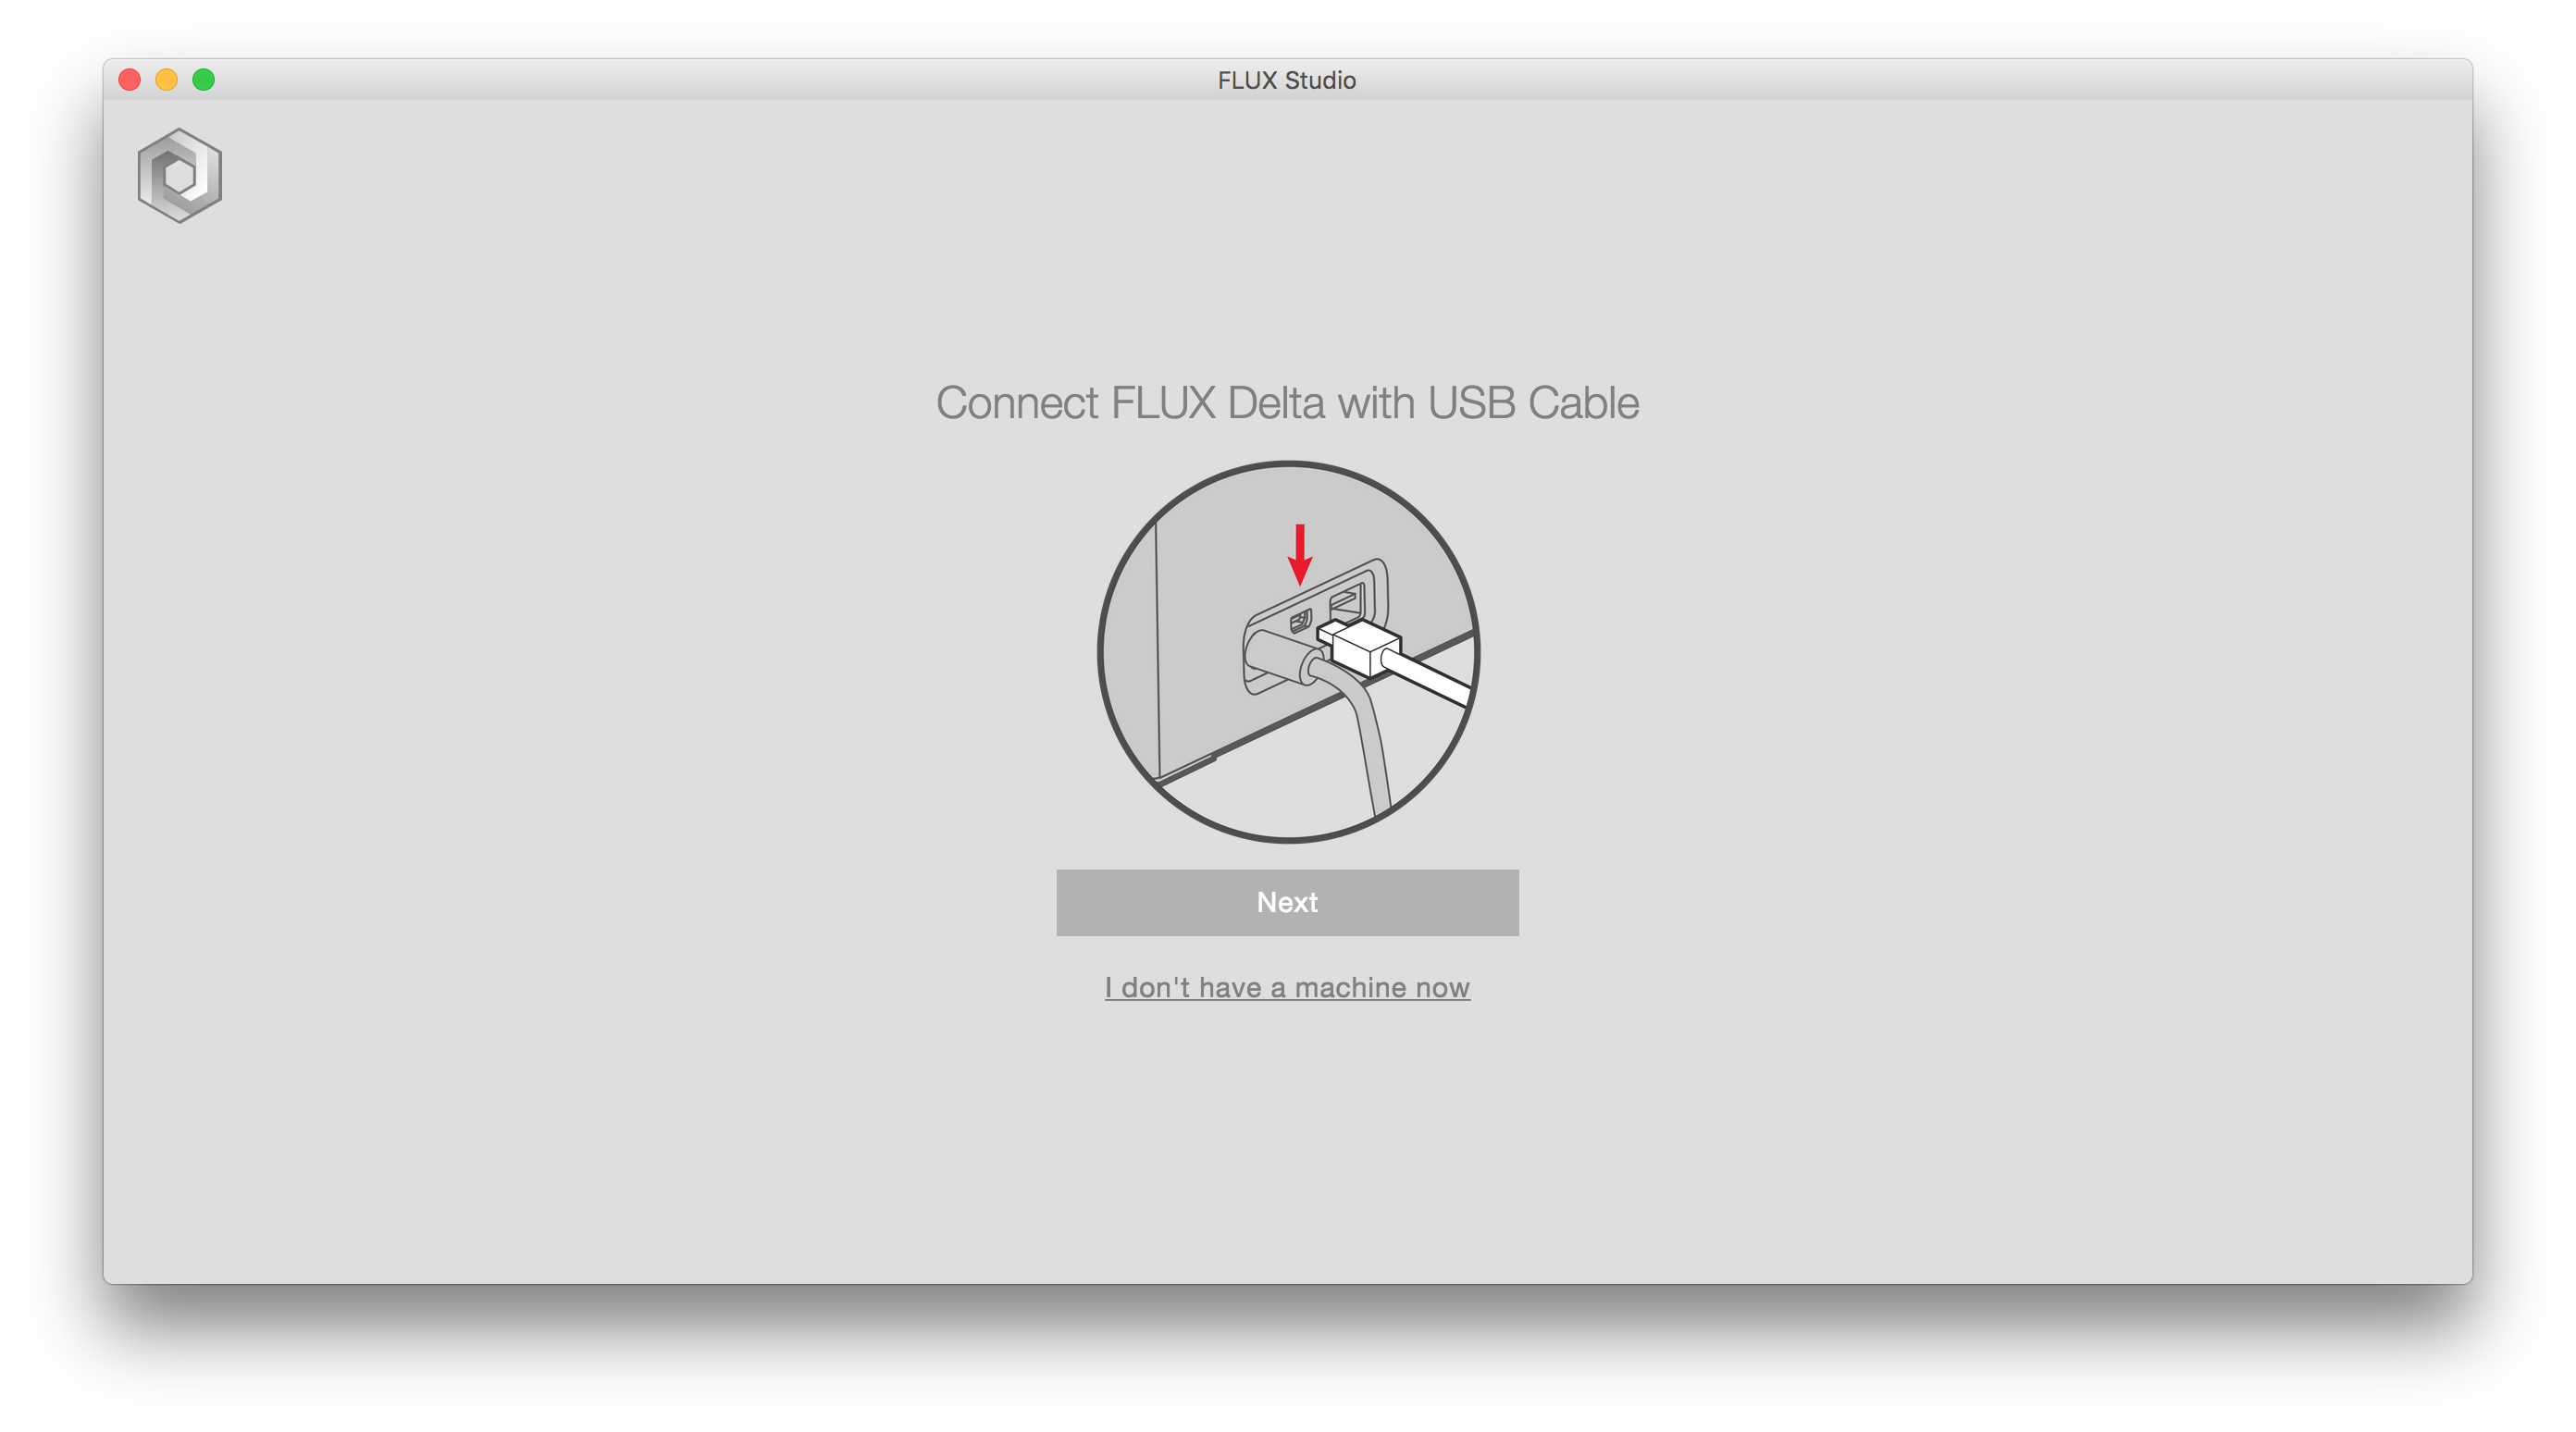
STEP 1: Open up FLUX Studio and connect your computer to the Delta via micro-usb cable.
Kindly be gentle when you plug in the cable, and make sure you've installed the driver.
Trouble Shooting: USB Device not found
STEP 2: Set your Delta's name and password
If you're going to use the machine as WiFi station mode, make sure there is only alphabets, digits, underscore, and dash in the name, and it will be used as the name of WiFi station ( SSID ).
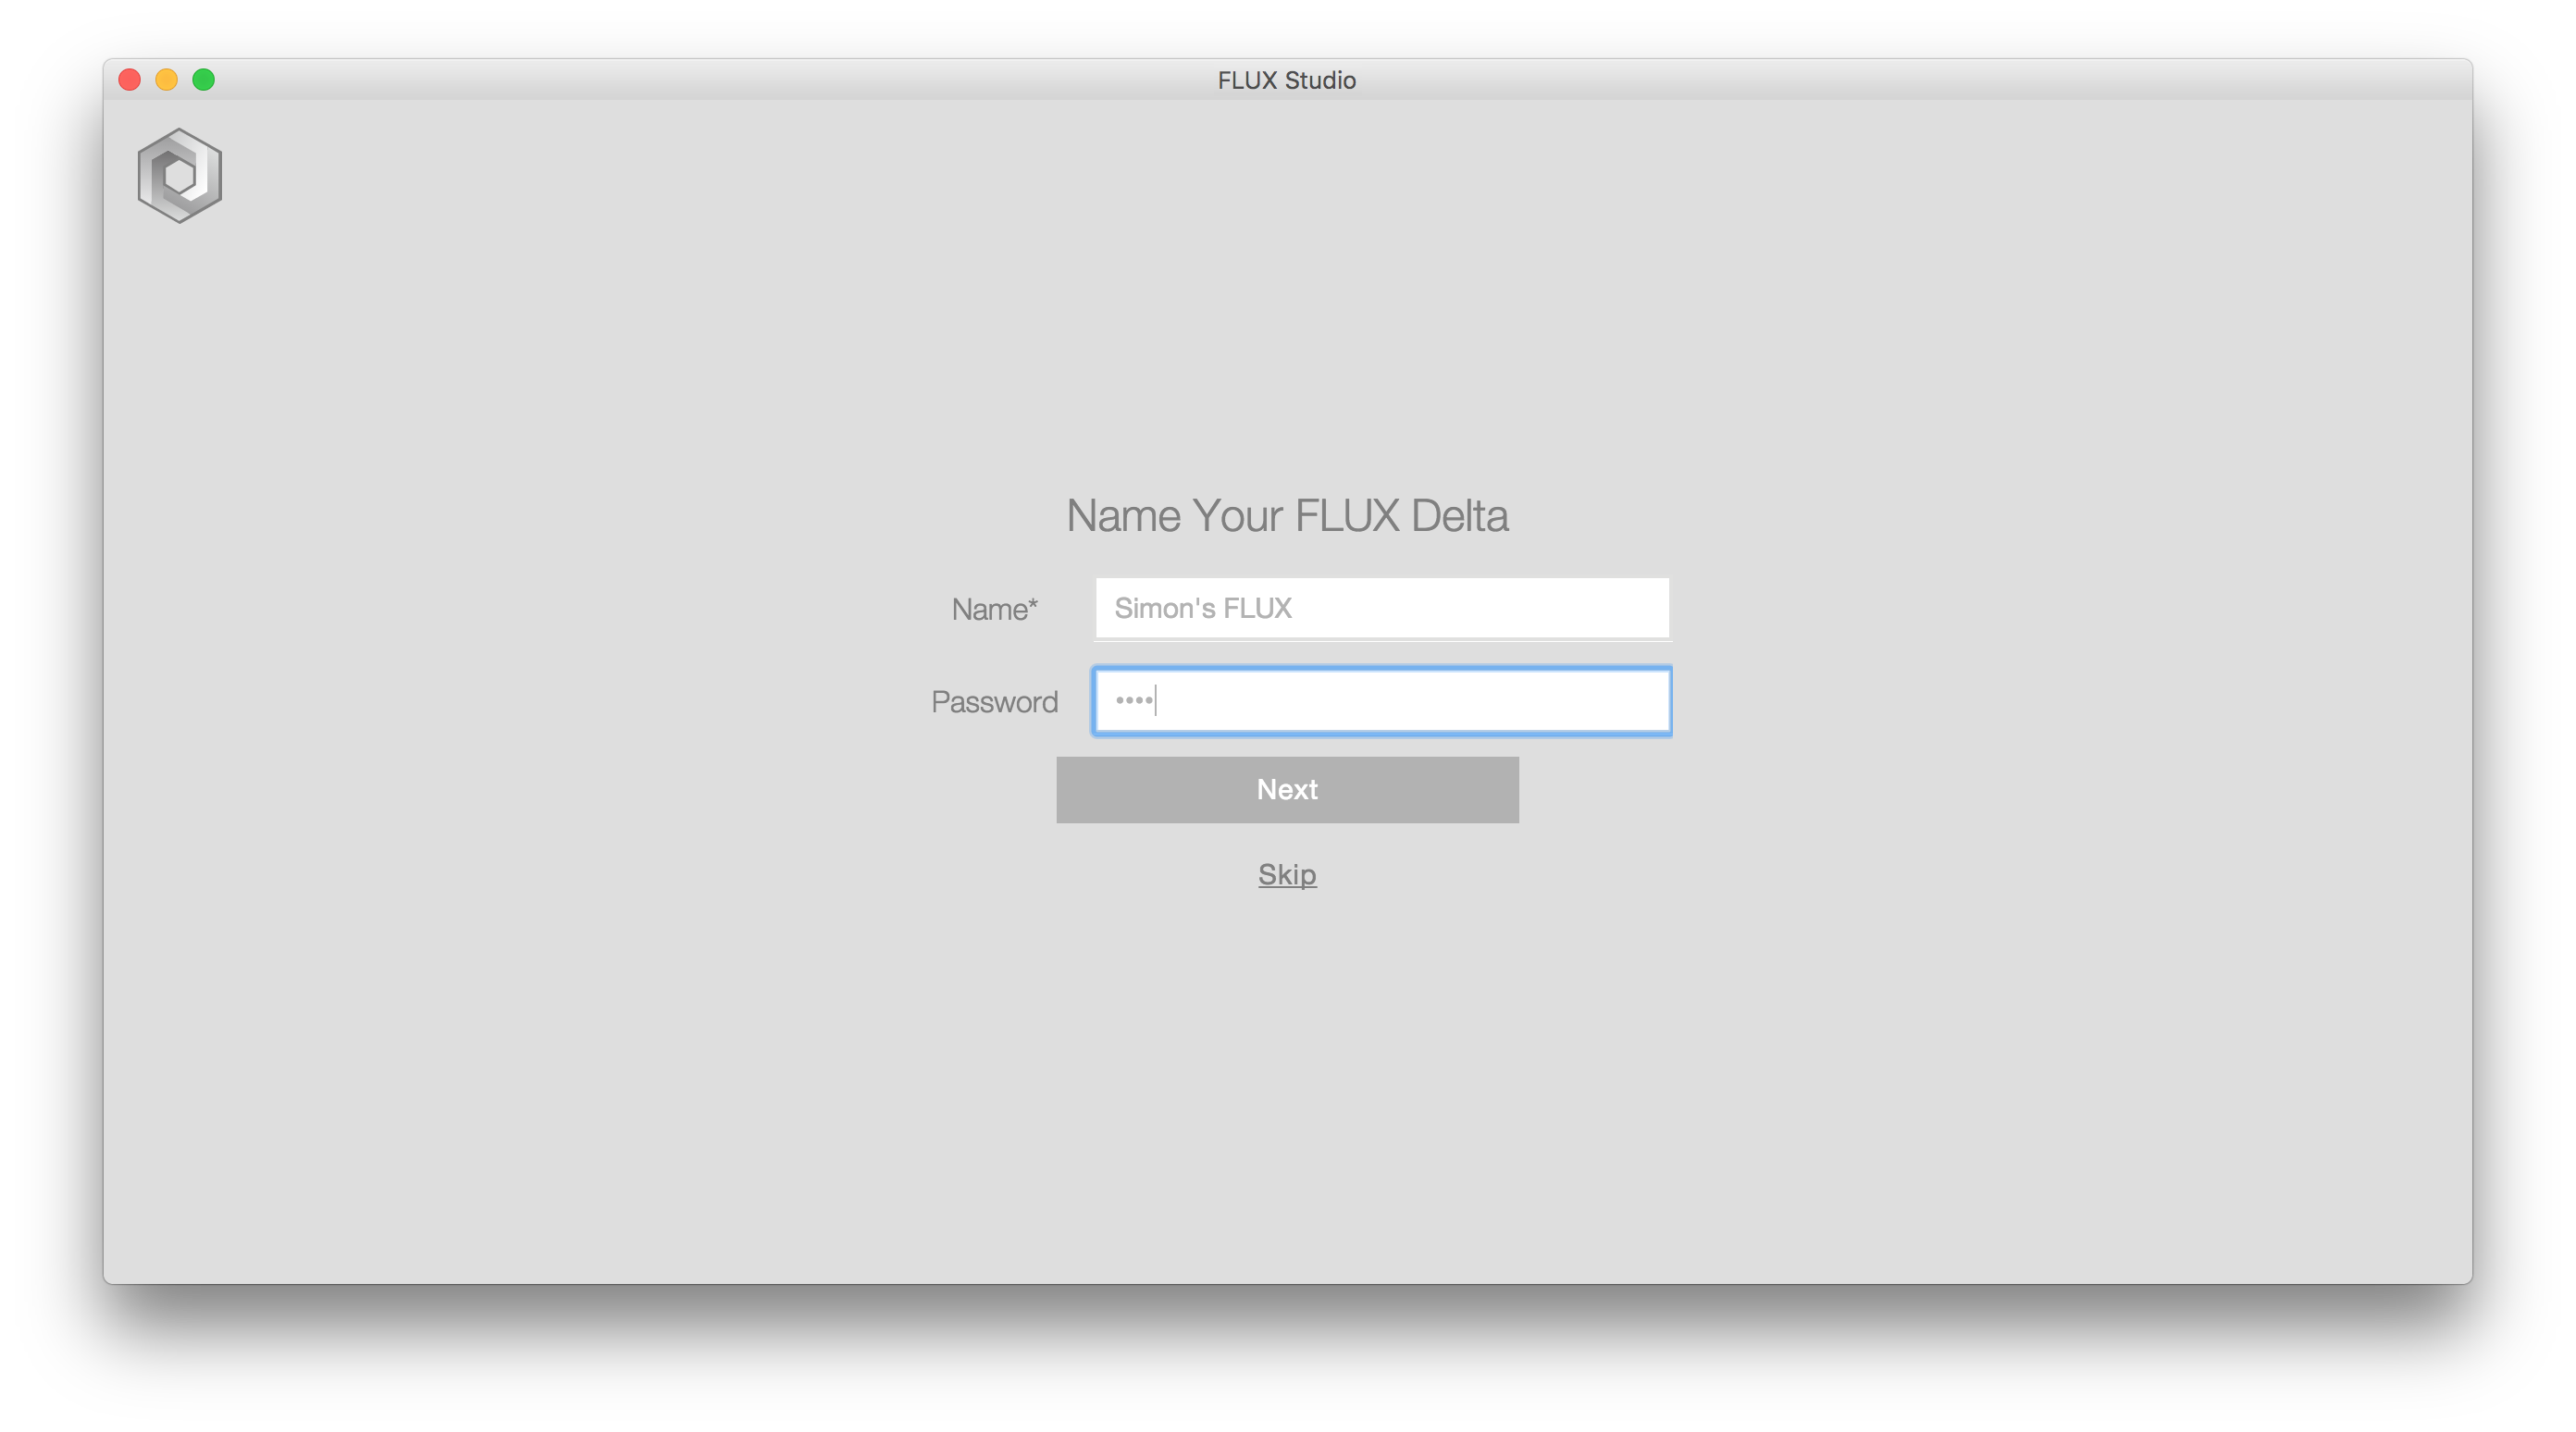
The password will works if other computers are trying to access the same machine through the same WiFi.
STEP 3: Select your preferred network

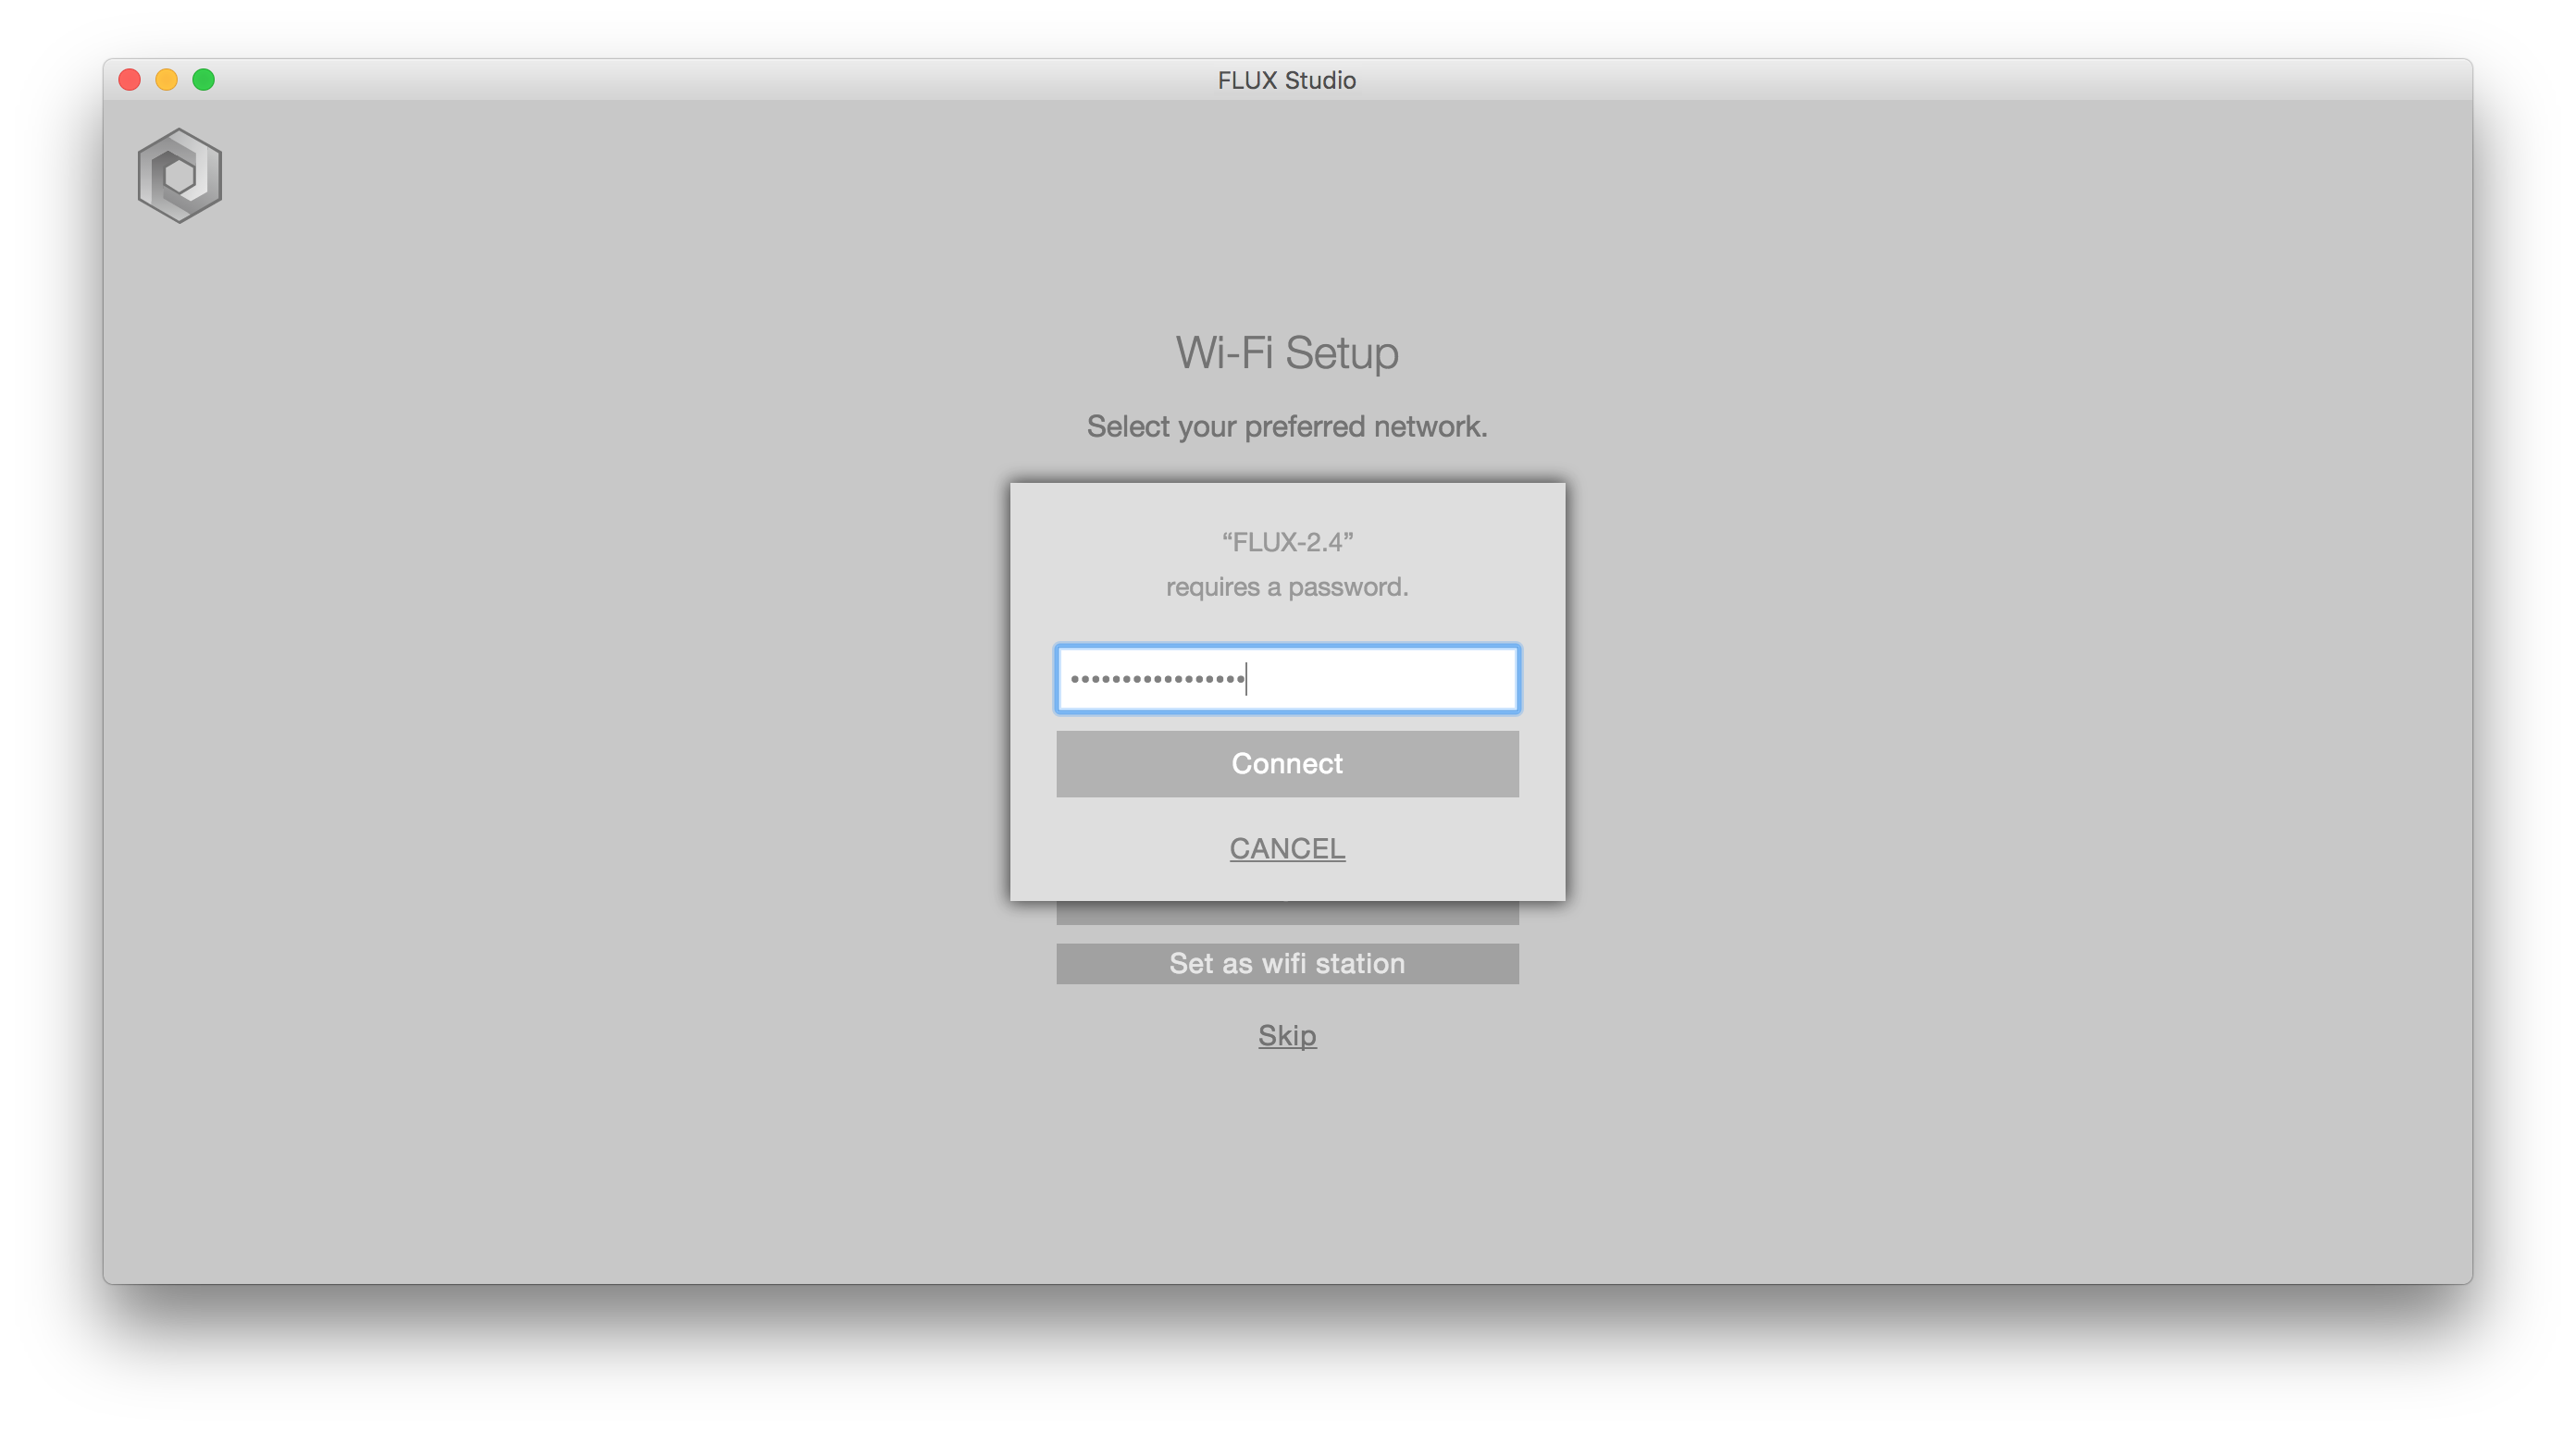
Trouble Shooting: No Wi-Fi found
STEP 4: Wait for the connection
Trouble Shooting: "Unable to Connect" when selecting WiFi
STEP 5: Good to go!

STEP 6: Go through the tutorial
You can now check the next chapter - Print Like a King.
.
Trouble Shooting: FLUX Device not found
If you are stuck at any step, please submit a support ticket so we can follow up your issue, meanwhile you're waiting the response, kindly check Using USB Drive to Print.
Comments
0 comments
Please sign in to leave a comment.