
Step 1 - Adjust the focus distance.
Button functions:
1. Move the galvanometer arm upward.
2. Move the galvanometer arm downward.
3. Start engraving.
Adjust the position of the galvanometer arm using the up and down buttons to align the two red dots for focusing.
Step 2 - Import the engraving test file.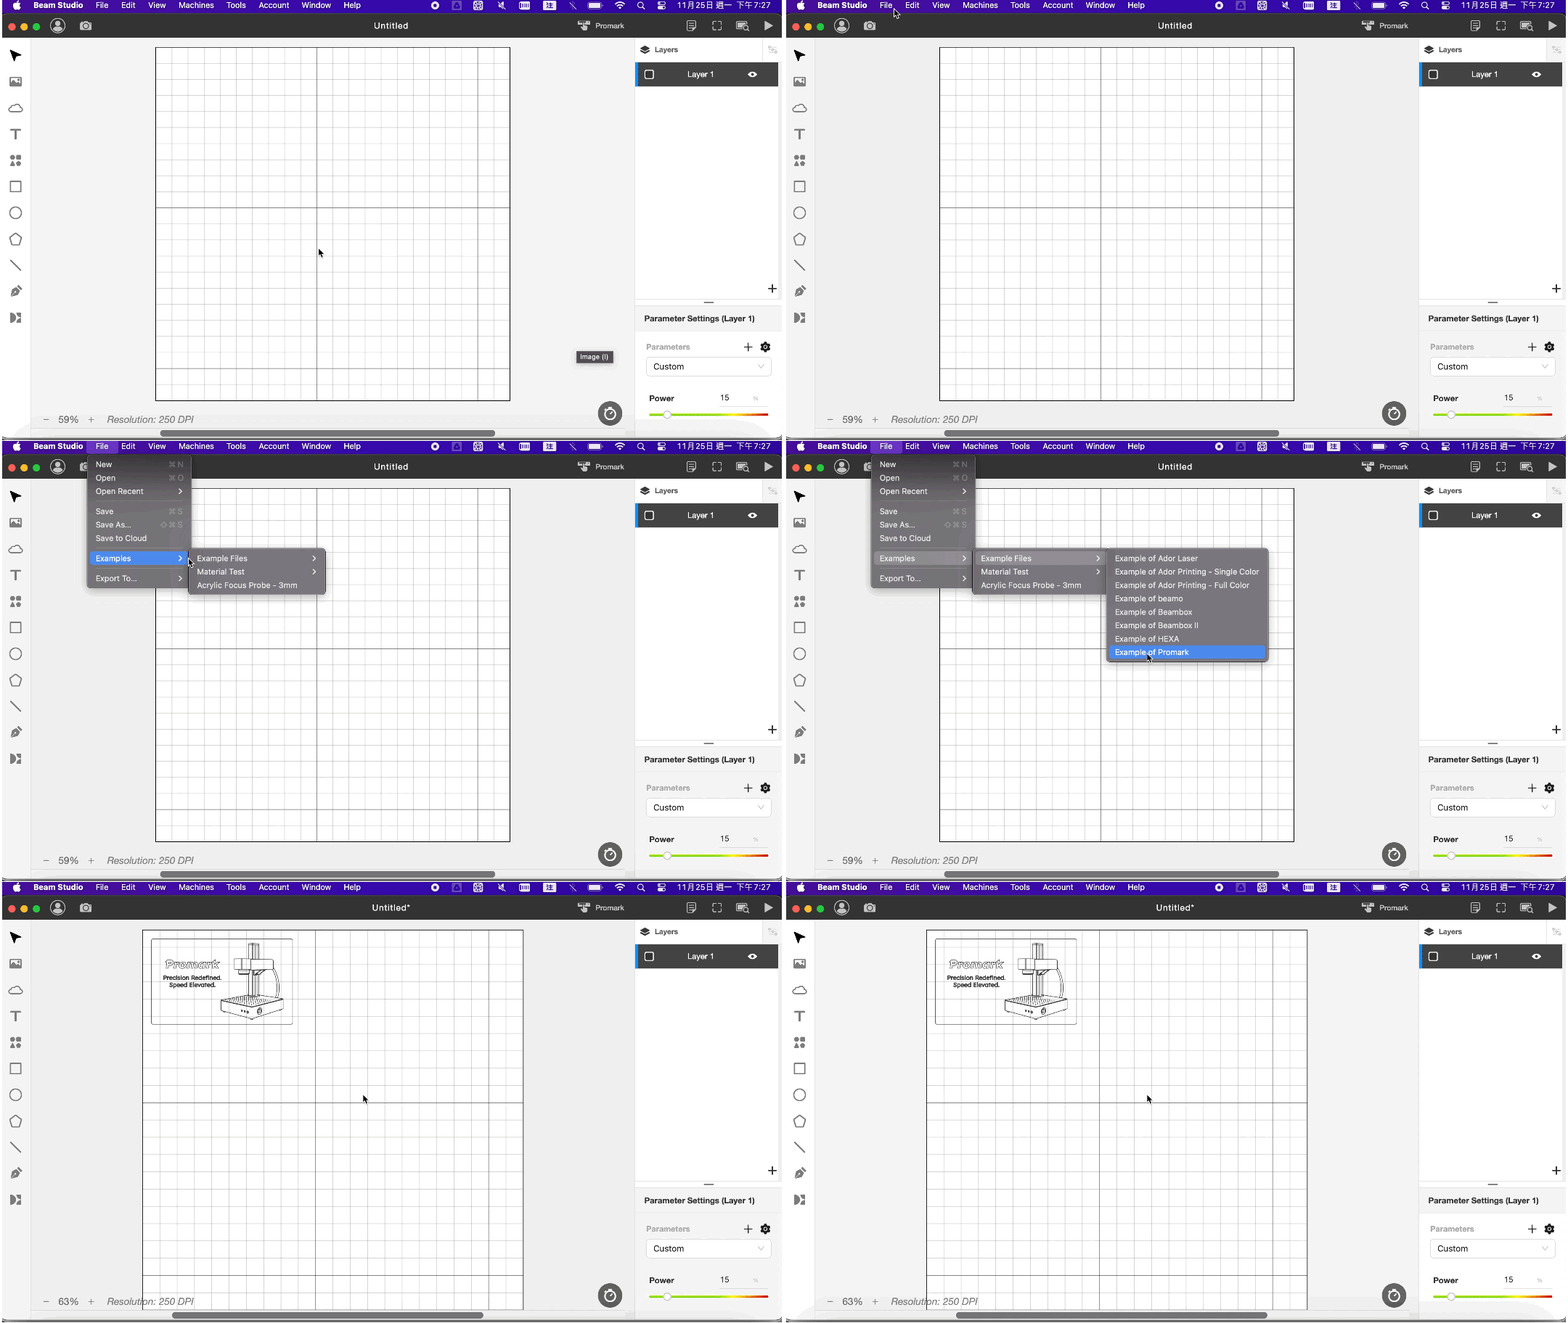
Step 3 - Set parameters (six machine models)
Parameters for test engraving on black aluminum for each model:
This article uses the Promark Desktop MOPA Fiber Laser Marker 100W as an example.
Step 4 - Preview the engraving position.
Click the "Frame Preview" at the top right of Beam Studio, and place the black aluminum sheet from the accessory box inside the red laser preview frame.
If you want to use the camera to preview the engraving position, please first calibrate the camera.
Camera Preview Steps:
b-1 Place the black aluminum sheet in the work area.
b-2 Click on the "Camera Preview" button at the top left of Beam Studio to capture a photo and confirm the position of the black aluminum sheet.
b-3 Move the engraving file to the black aluminum sheet.
Step 5 - Sending the task.
⚠︎ If you are using the Promark (Safety+), please refer to this link to enable the door protect function before you start the laser for your safety.
Step 6 - Check the engraving result.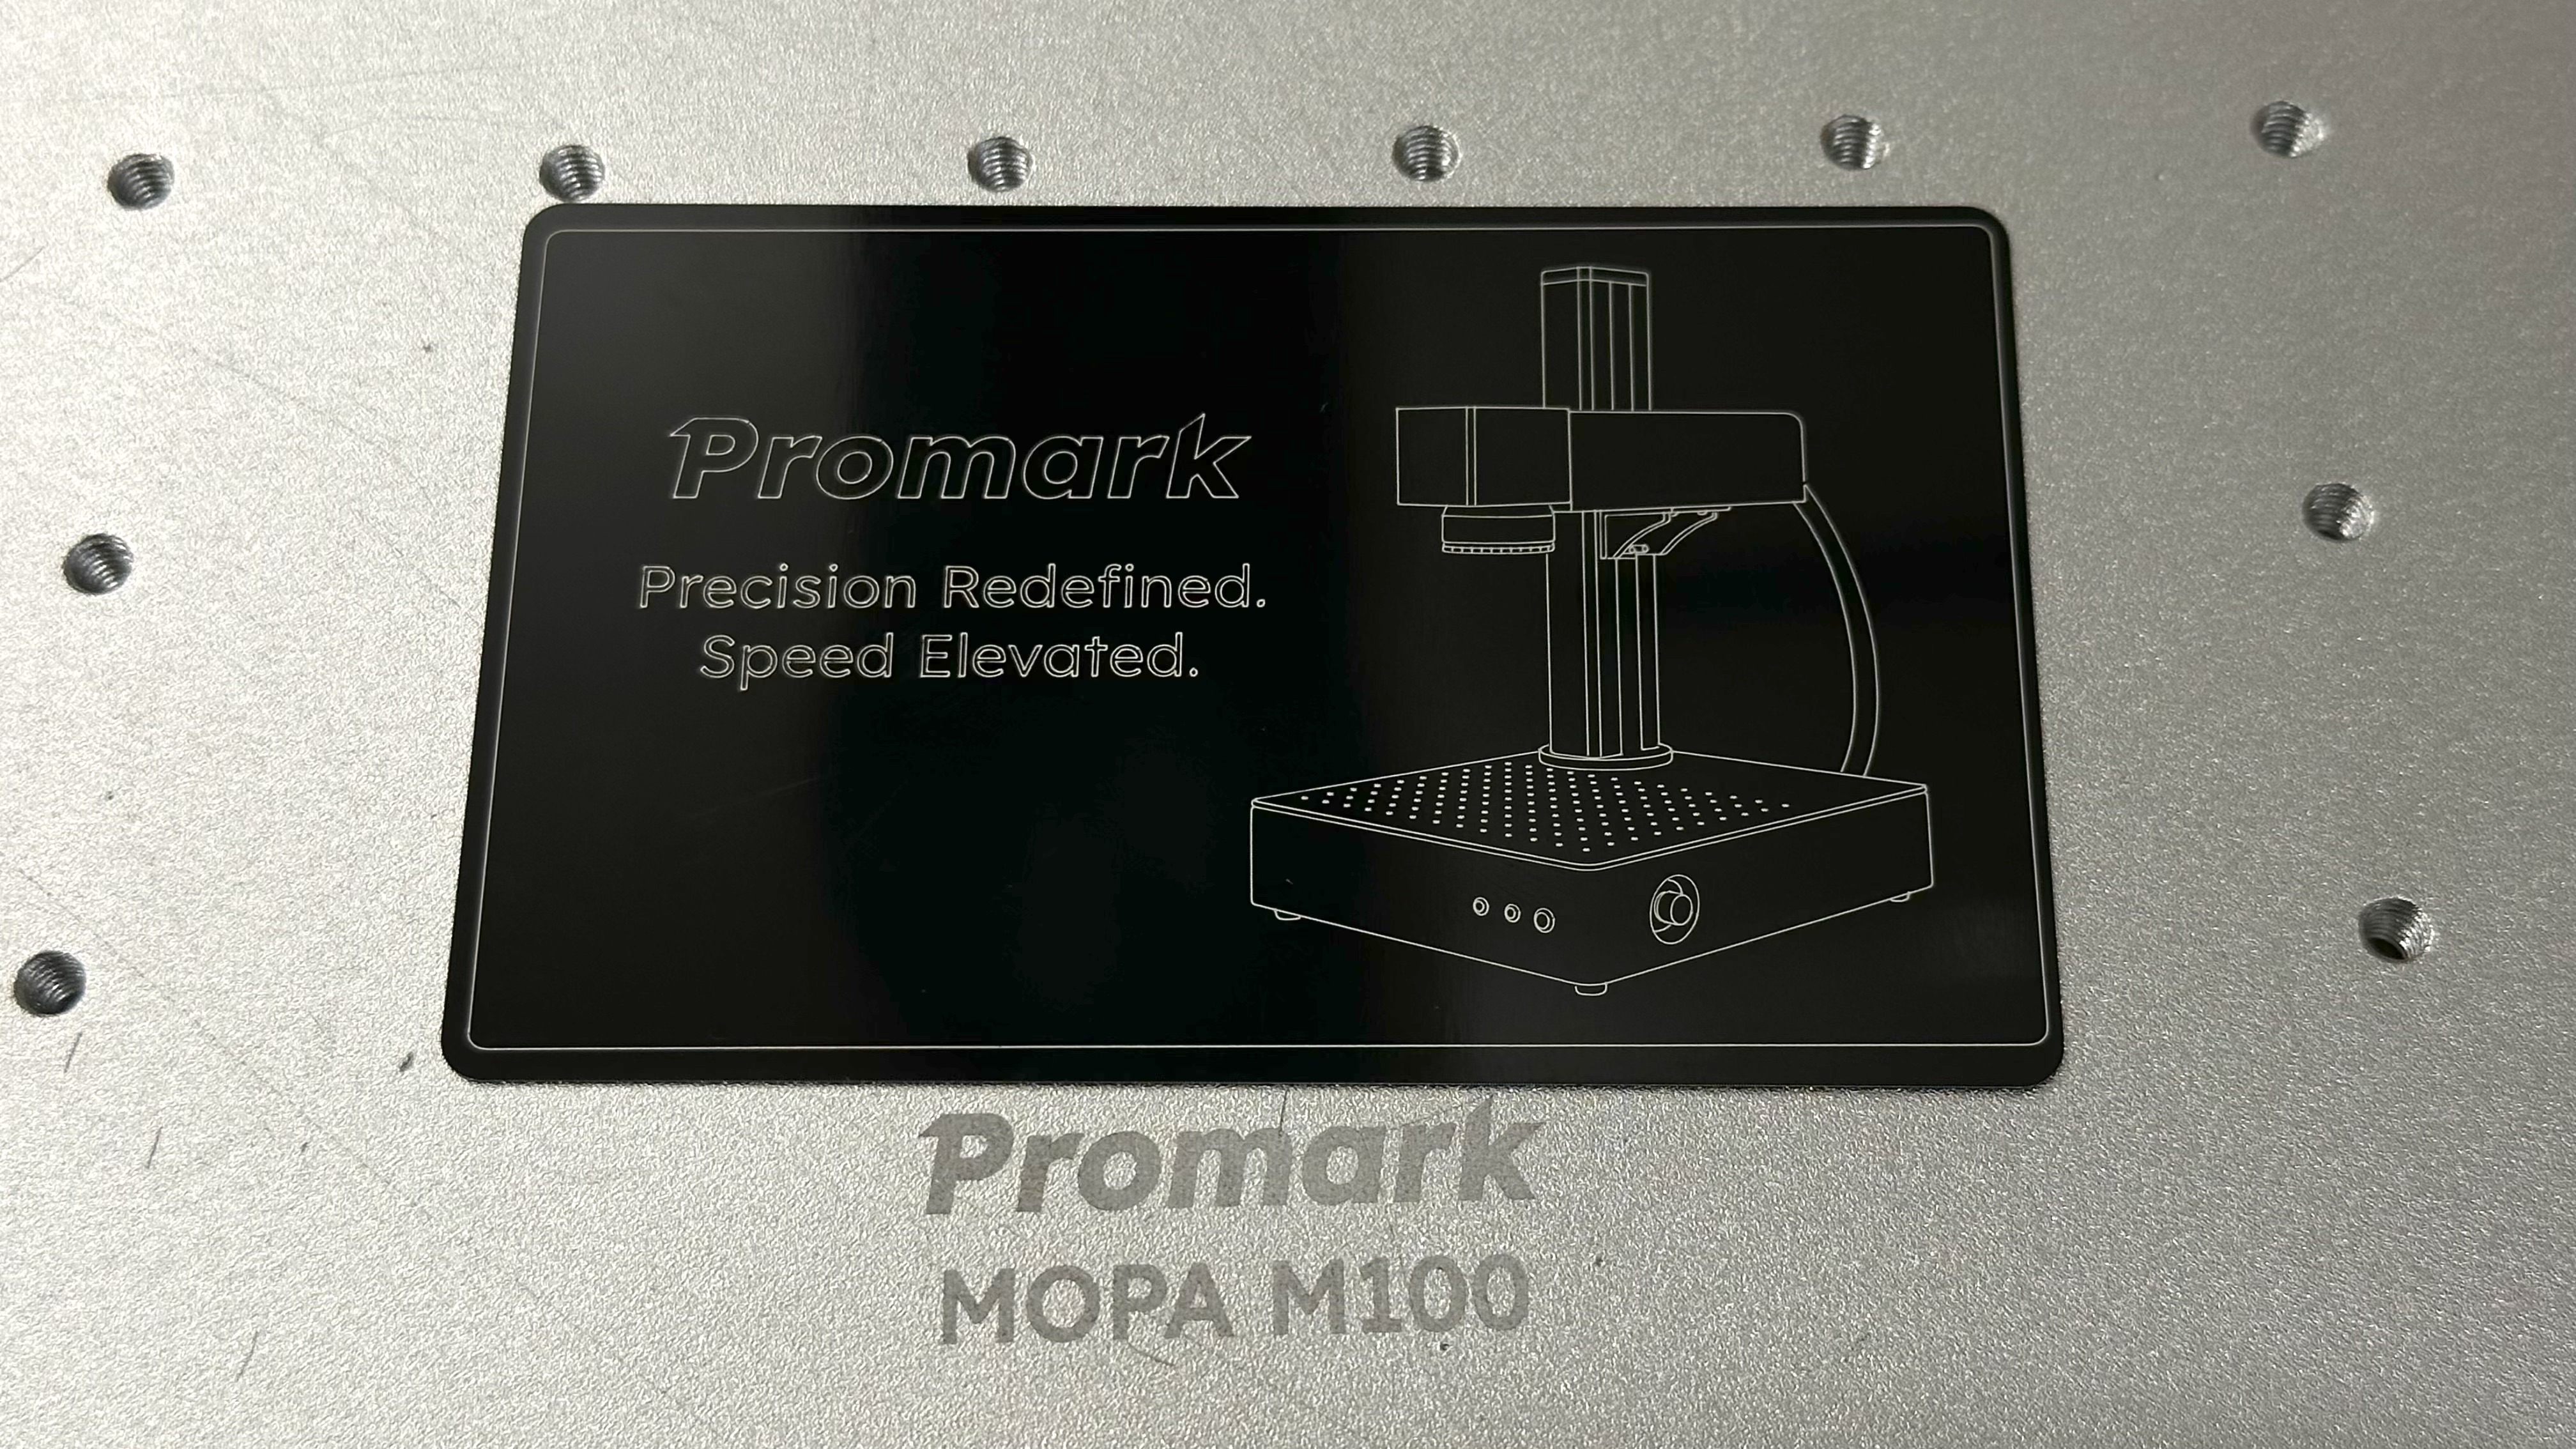
Comments
0 comments
Please sign in to leave a comment.