When you use Beam Studio for the first time, after selecting your language and logging in, you will be prompted to choose a connection method for your machine.
This section explains the different methods to connect your machine to a computer. There are four main connection options:
|
WiFi |
Wired Network |
|
The most common and convenient method. Required Equipment
|
Offers a faster and more stable connection. Required Equipment
|
|
USB Connection |
Direct Connection |
|
Directly connect using a USB cable. Required Equipment
|
Use when the network environment is not working. Required Equipment
|
1. Wi-Fi 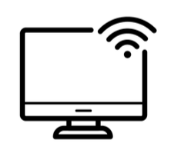
a. Set up the machine network:
- Navigate to "NETWORK" > "Connect to Wi-Fi" and select your Wi-Fi network.
- Enter the Wi-Fi password and press "Confirm."
- Confirm the "Wireless IP" of the machine on the "NETWORK" page.
- Note: Ensure your computer is on the same Wi-Fi (2.4 GHz).
-
If the machine didn't show your Wi-Fi name:
- Make sure your Wi-Fi is Public. If not, please select "NETWORK"> "Connect to Other Wi-Fi"> Enter the network name > Choose a security method > Enter the Wi-Fi password and press "Confirm."
- (HEXA) Insert the Wi-Fi dongle and set the antenna at 90 degrees to the side USB port on the side of the machine to improve signal reception.
Choose "Wi-Fi."
c. Enter the IP address:
Input the machine's IP address to complete the setup.
2. Wired Network 
a. Connect the Ethernet cable:
Connect the Ethernet cable to the port on the machine's rear and the router. The machine will automatically connect once installed.
b. Confirm the machine network:
Check the Wired Network "MAC Address" on the "NETWORK" page.
c. Select the connection method:
Select "Wired Network."
d. Enter the IP address of the machine to complete the setting:
Enter the IP address of the machine to complete the setup process.
3. USB Connection 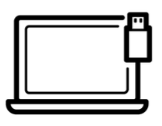
You can also connect to the machine directly via a USB cable for Beambox II, HEXA, and Ador only.
For Windows Users:
a. Connect the USB cable:
- Connect the USB-B port on the machine's rear to the USB-A port on your computer.
b. Confirm the machine network:
- Check the Wired Network "MAC Address" on the "NETWORK" page.
- Go to "Settings" > "Network & Internet" > Ethernet – "Properties" and ensure the "IPv4 DNS servers" is set to 10.55.0.17.
c. Select the connection method:
Select "USB Connection".
d. Enter the IP address:
Input 10.55.0.17 to complete the setup.
For macOS Users:
a. Connect the USB cable:
Connect the USB-B port on the machine's rear to the USB-A port on your computer.
b. Confirm the machine network:
Go to "System Preferences" > "Network" and ensure USB HEXA 2 LAN shows as Connected.
c. Select the connection method:
Choose "USB Connection."
d. Enter the IP address of the machine to complete the setting:
Enter the IP address of the machine, in this case, 10.55.0.1, to complete the setup process.
4. Direct Connection 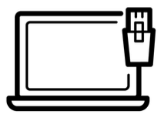
You can also connect directly to your computer via an Ethernet cable.
For Windows 10/11 Users:
a. Connect the Ethernet cable :
Connect the Ethernet cable from the machine's rear to the computer.
(PoE not supported)
b. Confirm the machine network :
Check the Wired Network "MAC Address" on the "NETWORK" page.
c. Enable Internet connection sharing :
- Go to "Settings" > "Network & Internet" > "Change adapter options."
- Right-click the network you are using, select "Properties" > "Sharing," and check the boxes to allow network sharing.
- Check the boxes next to "Allow other network users to connect through this computer's Internet connection" and "Allow other network users to control or disable the shared Internet connection."
After confirmation, the word "Shared" will be displayed under that network.
In the "Network Connections" window, you will see an "Unidentified network," the network to which the machine is connected.
d. Select the connection method:
Select "Direct Connection."
e. Enter the IP address:
Confirm the "Wired IP" address of the machine from the panel. Enter the wired IP address of the machine into the computer to complete the setup process. It usually starts with 192.168. (If it starts with 169.254, the computer may be set up incorrectly or the network cable).
For macOS Users:
The method is applicable to the macOS 10.15+ environment.
a. Connect the Ethernet cable:
Connect the Ethernet cable to the Ethernet port on the rear of the machine and the computer.
b. Verify the machine network:
Verify that the machine has a value for Wired Network "MAC Address" on the "NETWORK" page.
c. Turn off the computer firewall:
Click “System Preferences” > “Security & Privacy” > “Firewall” > “Turn Off Firewall”.
d. Enable Internet connection sharing:
Click "System Preferences"> "Sharing". Set the "Share Your Connection From" to your network (Wi-Fi or Ethernet), then select the port to use. Click "Start" on the pop-up message to enable sharing.
e. Set the IP address of your computer to 192.168.2.1:
Click the network icon in the upper right and select "Network Preferences." Select the right interface (RJ45 adapter). For "Configure IPv4", select "Using DHCP with manual address" from the drop-down list and set the "IPv4 address" to 192.168.2.1.
f. Select the connection method:
Choose "Direct Connection."
g. Enter the IP address:
Enter the IP address of the machine to complete the setup process. The IP address usually starts with 192.168.
If it starts with 169.254, it means the computer may been set up incorrectly or the network cable needs to be unplugged and plugged in again.
5. I'm not seeing the Connection Setup Screen
Access via "Machines" > "Machine Setup" in the menu at any time.
6. Troubleshooting
Ensure all steps are followed correctly. If issues persist, refer to the troubleshooting guide or contact support.
Once the connection setup is complete, you can start your first laser engraving project!
Comments
0 comments
Please sign in to leave a comment.