
Recommended Frequency
Once every 3 months
Notes: In order to avoid the breakage of the glass laser tube due to the heat generated during laser excitation and water pump clogging, it is necessary to maintain the water-cooling effect with sufficient distilled water.
Preparation Items
Self-preparation:
* 400 ml of distilled or pure water
1|Needle nose pliers
2|Paper towel or rag
3|Water container
Included in the accessory box:
4|Torx screwdriver
5|3mm Allen key
6|Double head wrench
7|Funnel
This chapter will instruct on two parts of the cooling water replacement. Please refer to the step you are referring to.
If you are using the machine for the first time or the water is not overly dirty, you can skip steps 1 to 7 and proceed to step 8, adding water.
Step 10 - Water Filling
b. Put in the funnel.
c. Pour the water in slowly and keep it 50% full.
d. Close the pump cap.
e. Go to "Maintain Mode" and wait until it finishes homing, then press the "Pump" button to turn on the water pump.
f. When the water tank's water decreases, press the "Pump" button again to turn off the pump and pour in more water until the tank is 80% full.
g. Repeat the step above until the water is 80% full and won't decrease.
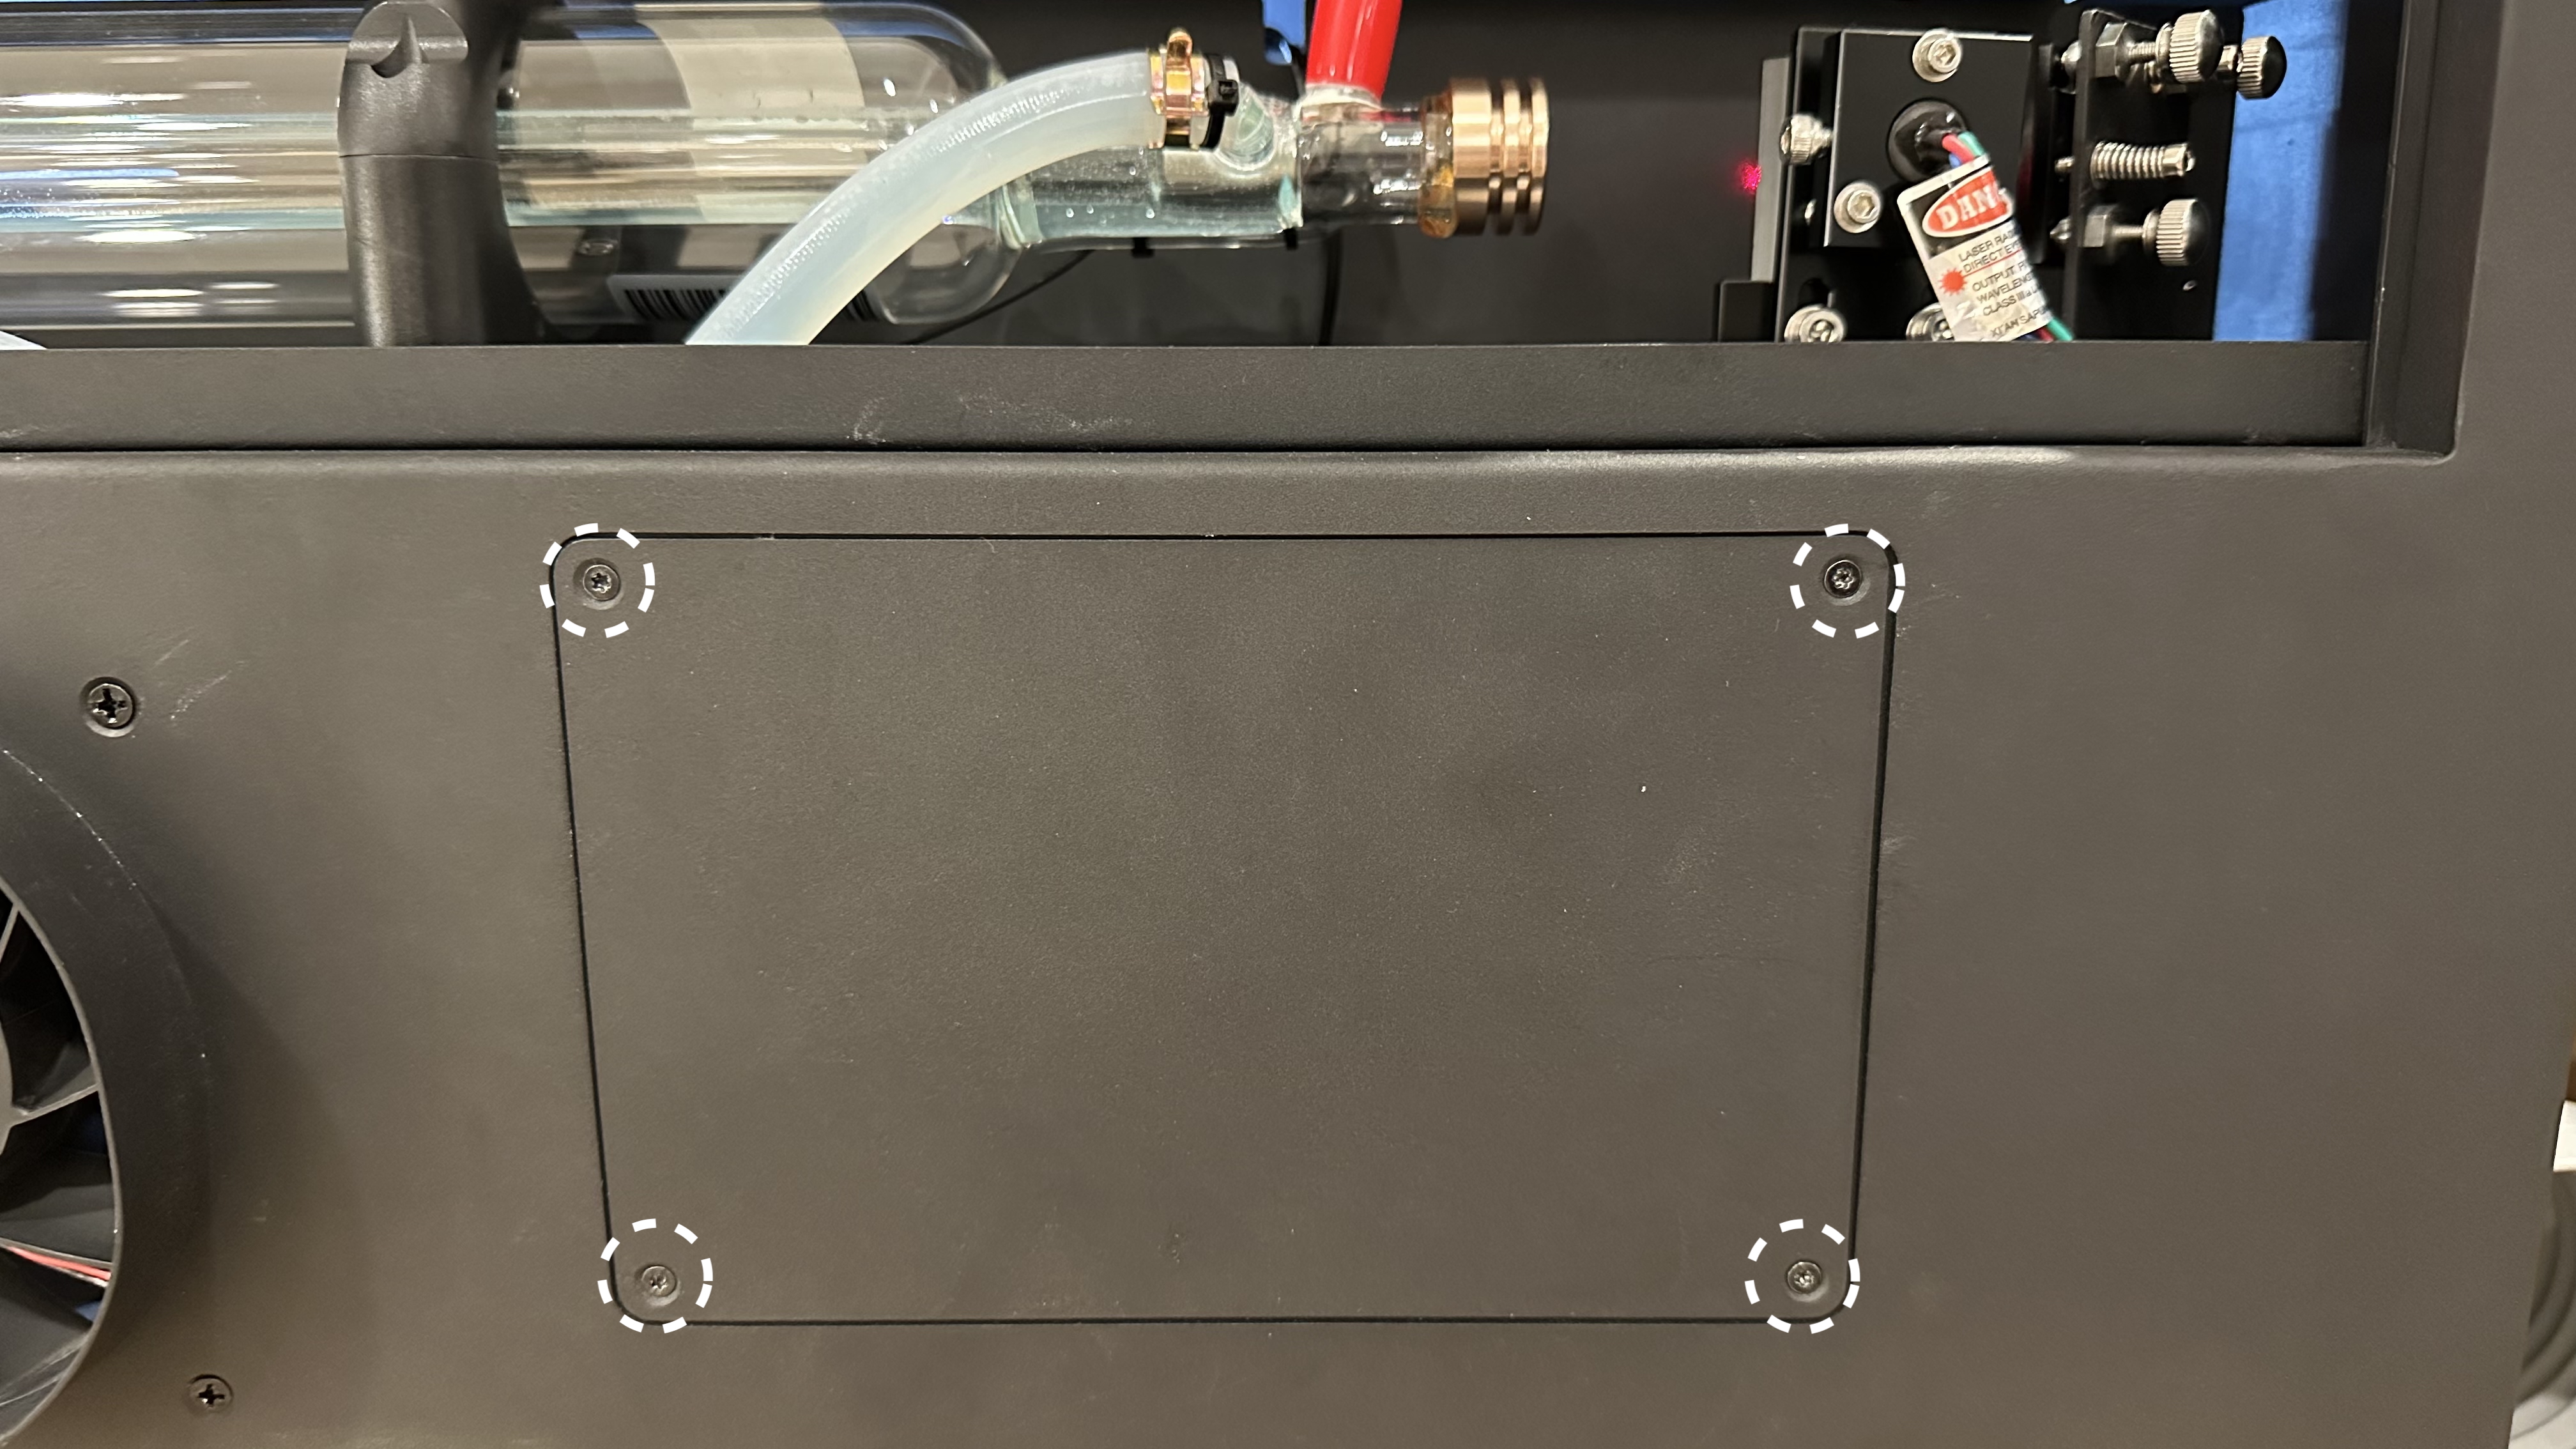
#END
ⓘ There are two methods to drain water from the laser tube.
If you decide not to move the laser tube, you can skip steps 1 to 3.
If you decide not to move the laser tube, you can skip steps 1 to 3.
a. Lift the laser tube to allow the water to drain out.
Remember that the optical path must be realigned after moving the laser tube.
Optical Path Adjustment
b. Blow into the hose to help drain the water out.
Step 1 - Unplug the power
(Skip this step if choosing not to move the tube.)- Turn off the machine and unplug the power cord before changing or adding water.
- Use a screwdriver to remove the screw on the back cover, then lift the cover.
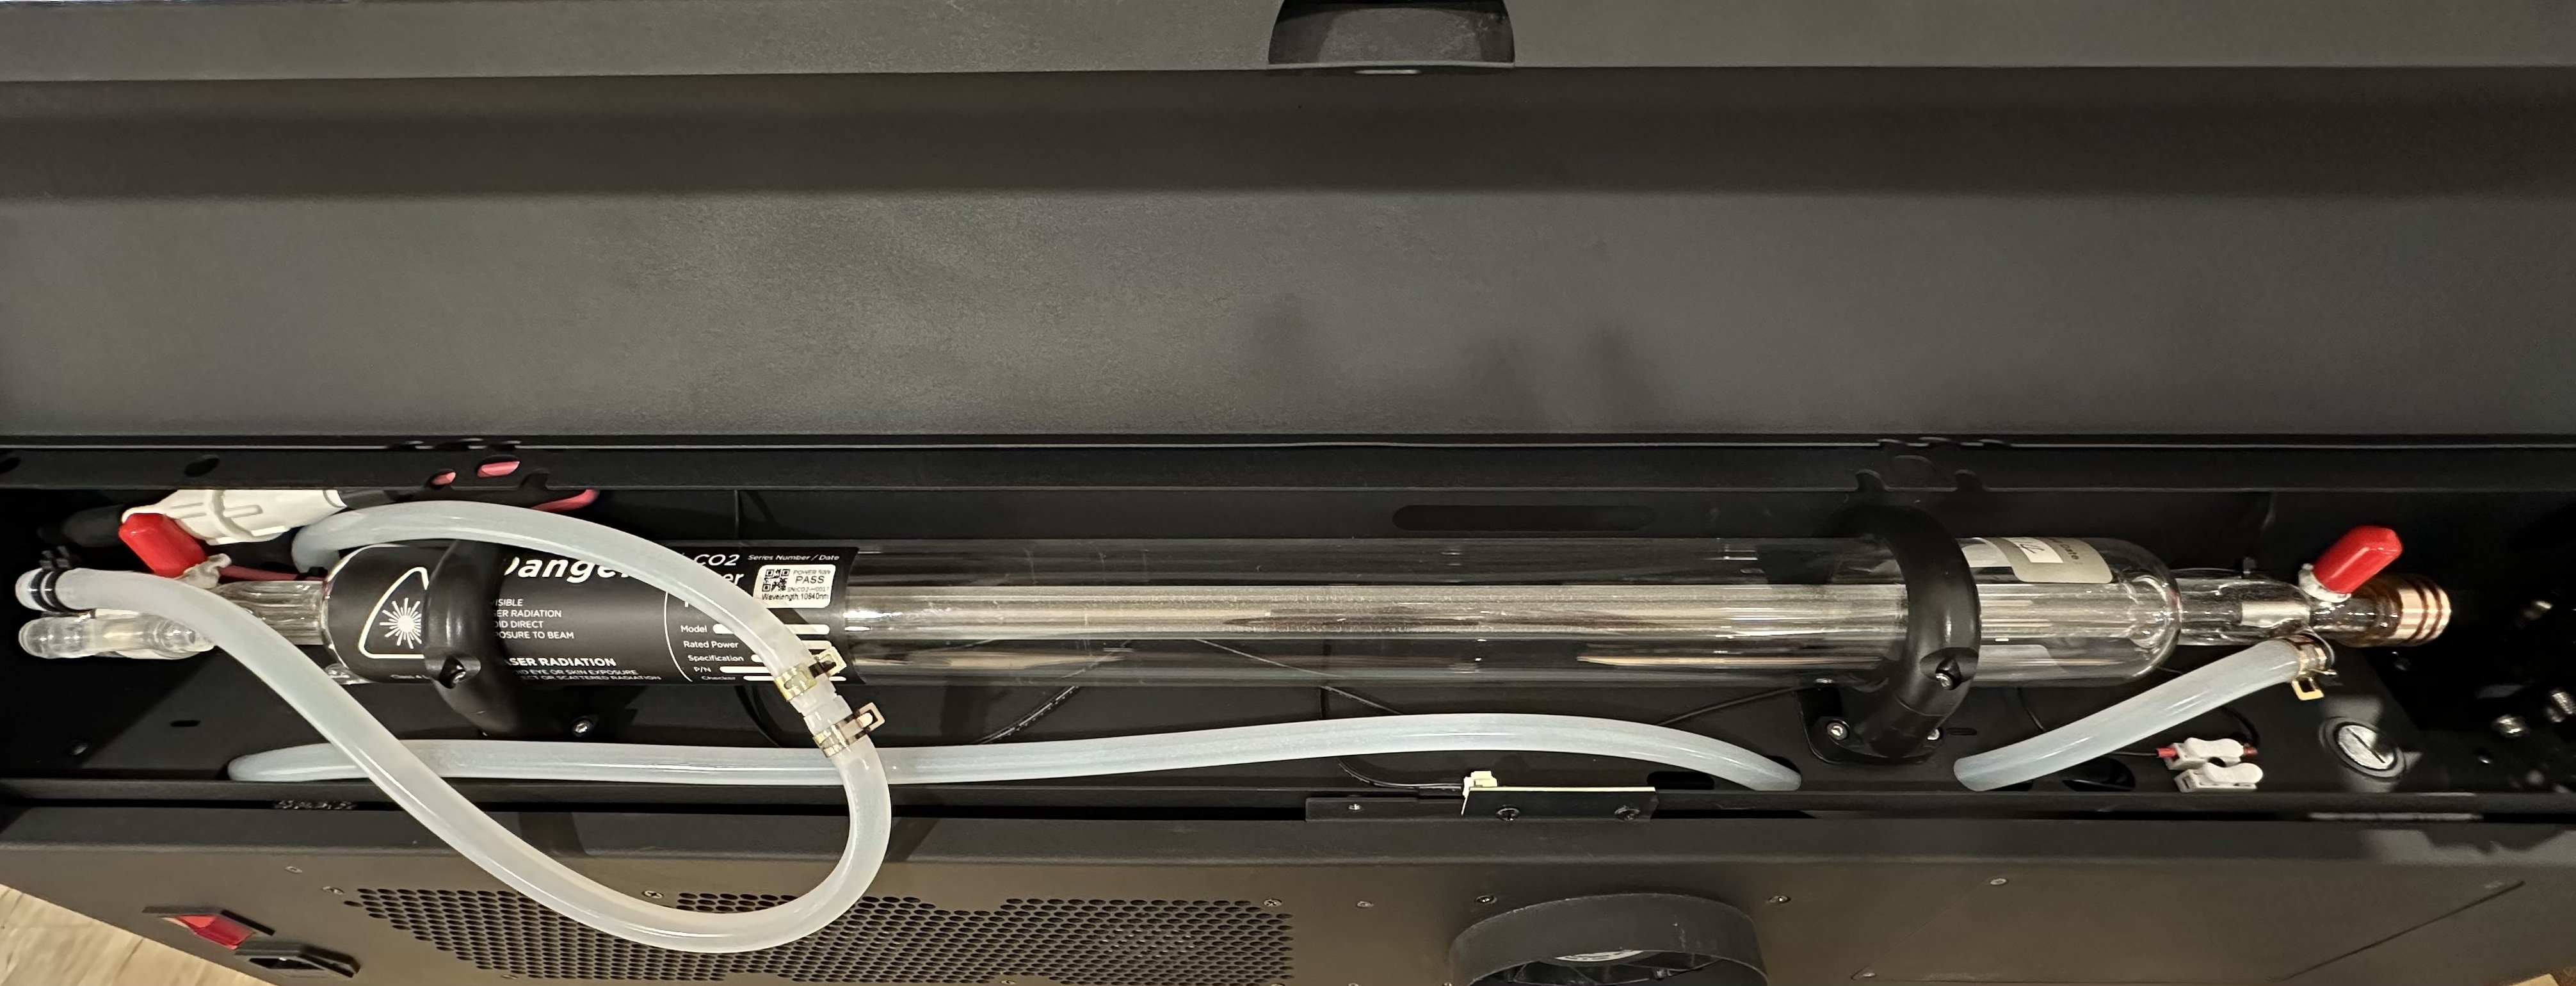
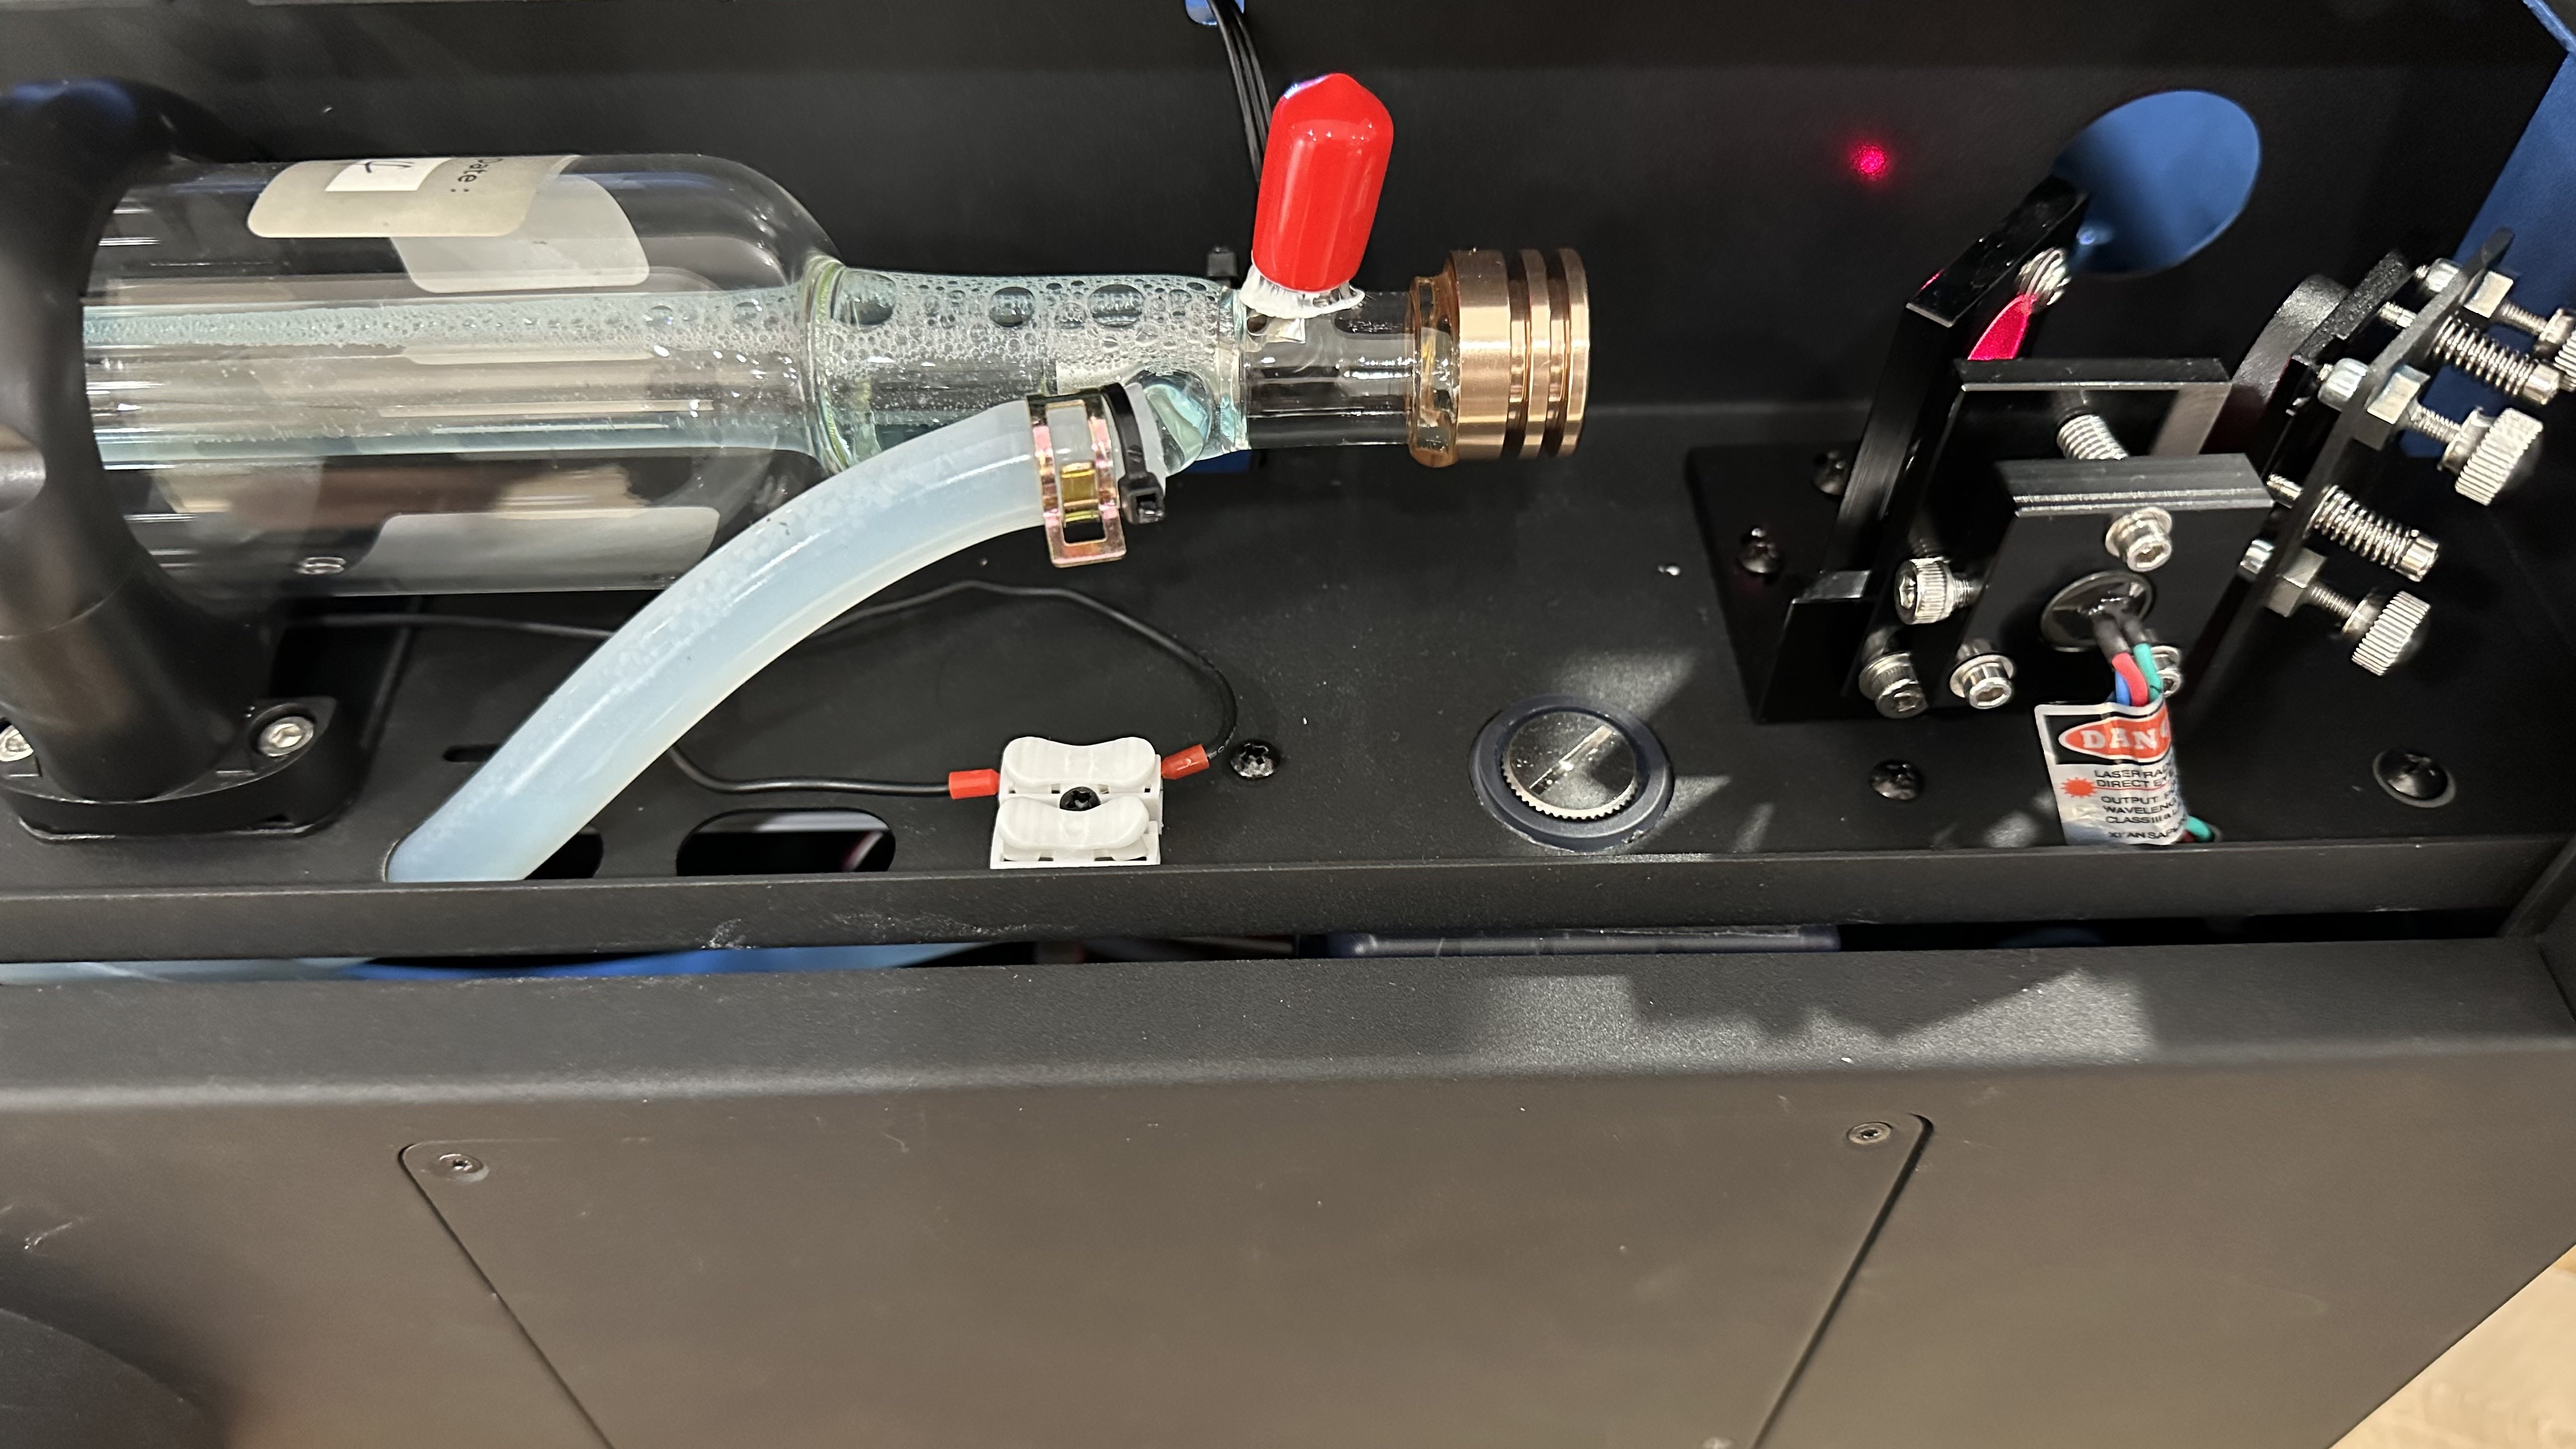
- The laser tube has two ends: the high-voltage side is near the screen, and the low-voltage side is near the reflective mirror.
Step 2 - Disconnect the laser tube wires
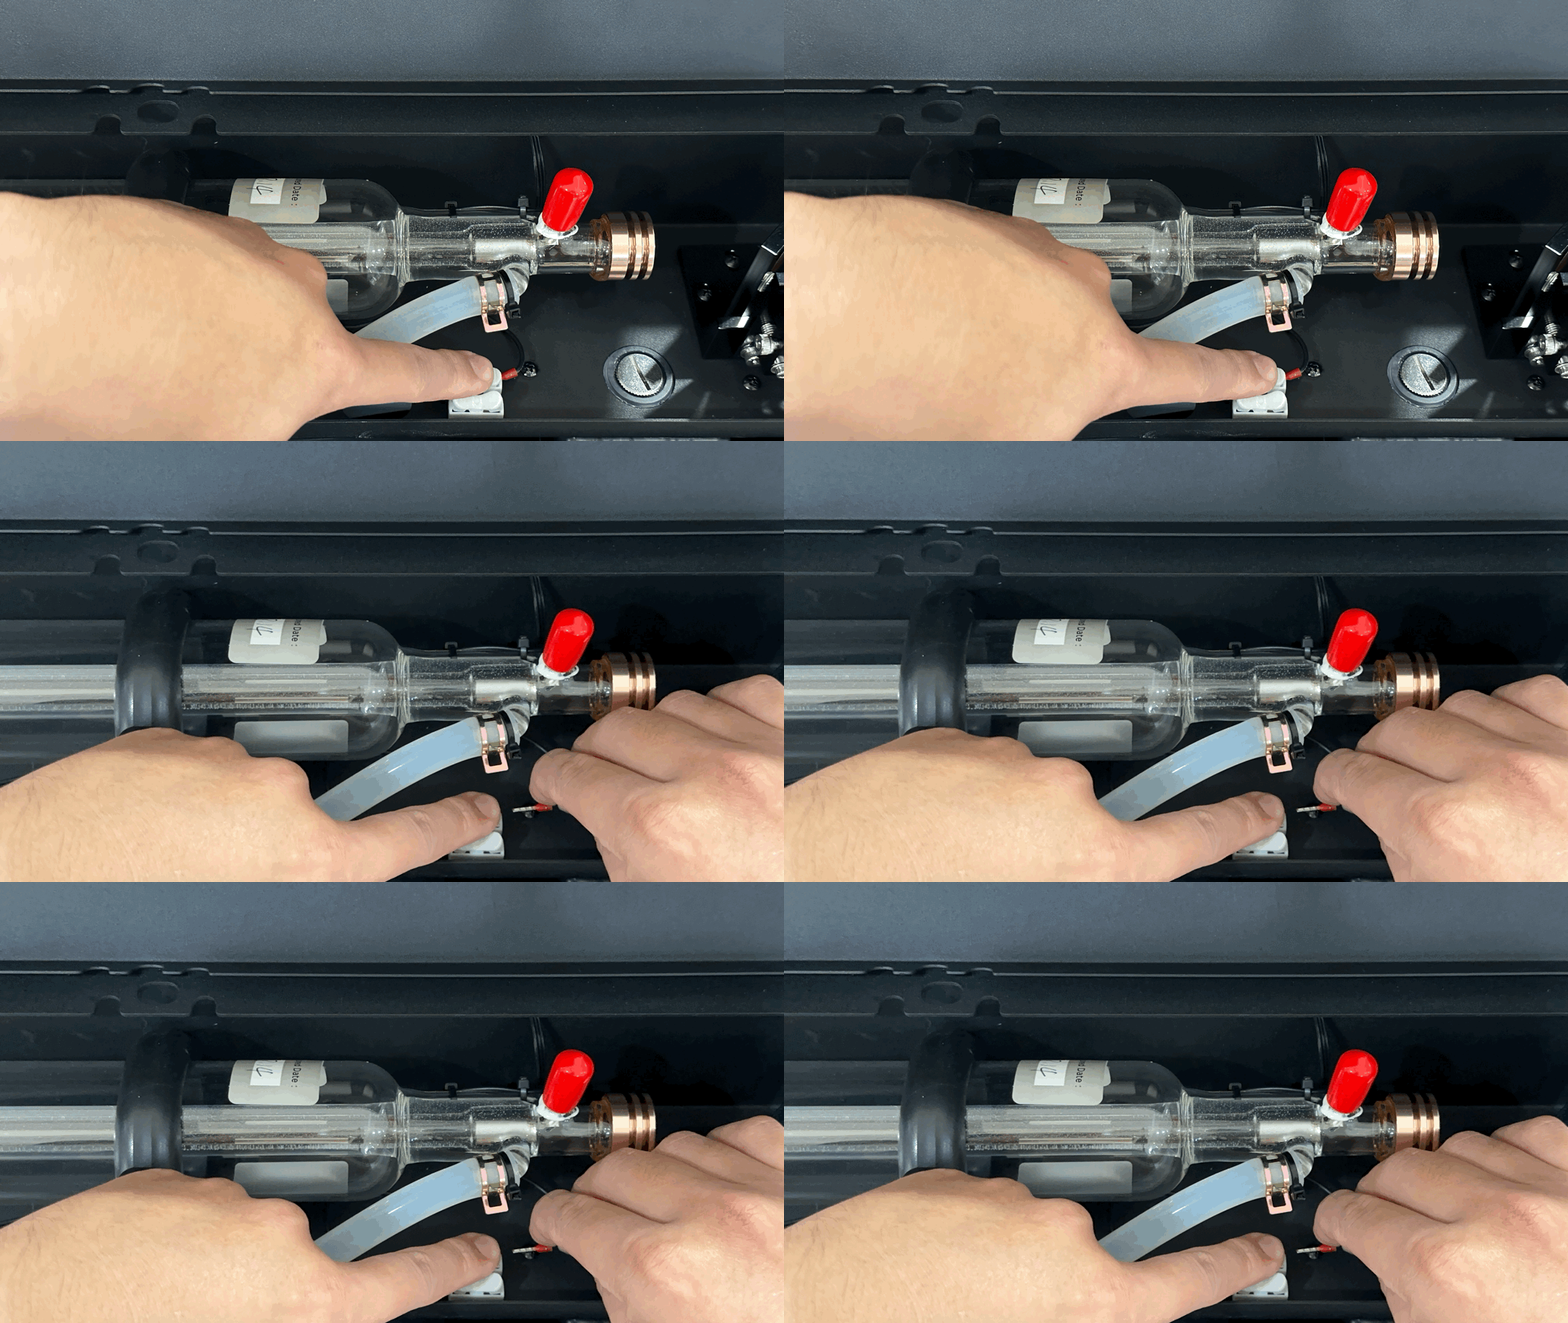
(Skip this step if choosing not to move the tube.)Press the white terminal and pull out the ground wire.Step 3 - Remove the laser tube holders
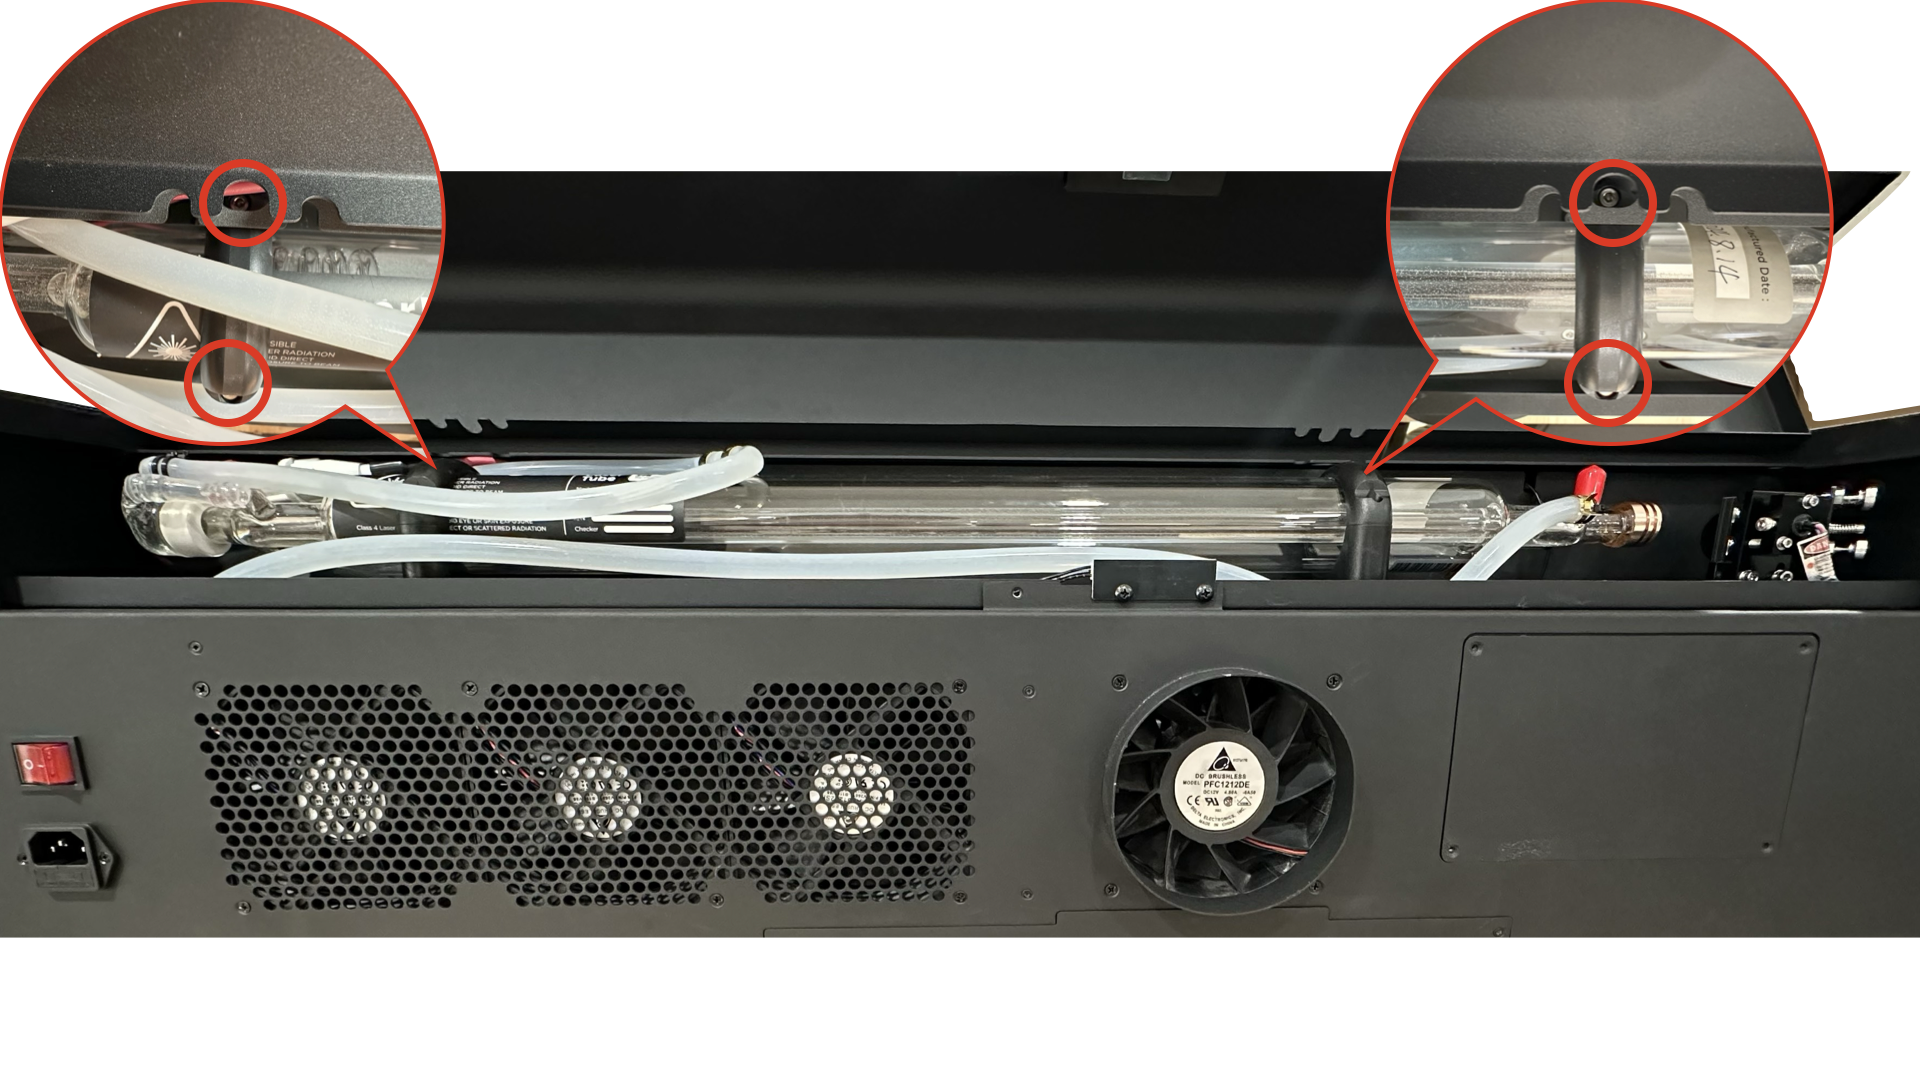
(Skip this step if choosing not to move the tube.)Use a 3mm Allen key to loosen a total of 4 screws on the laser tube holders (Photo below).Step 4 - Remove the laser tube to drain water out
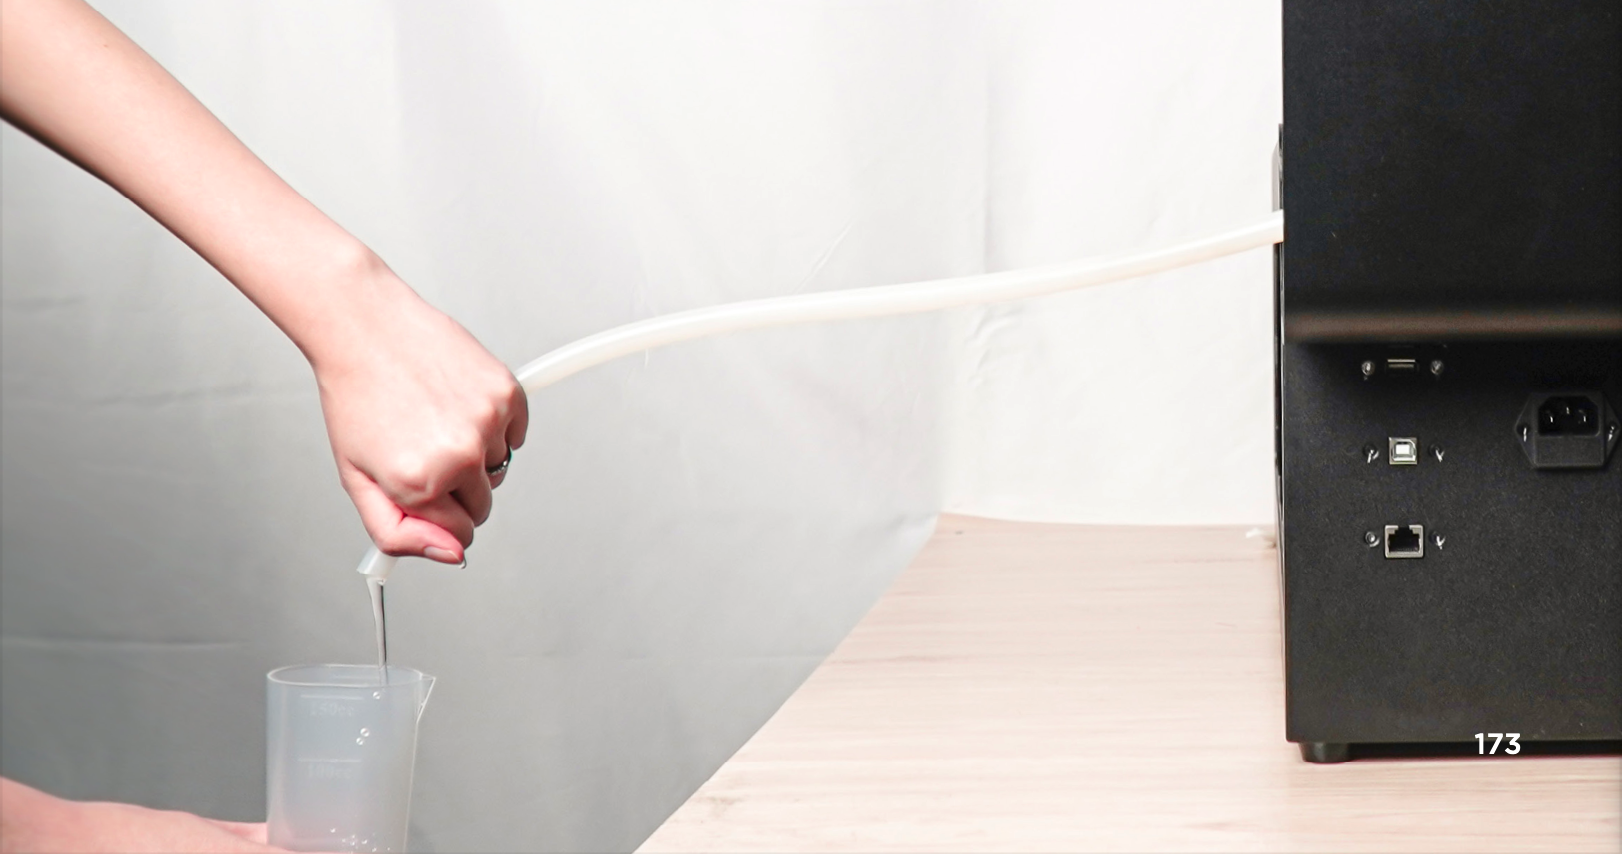
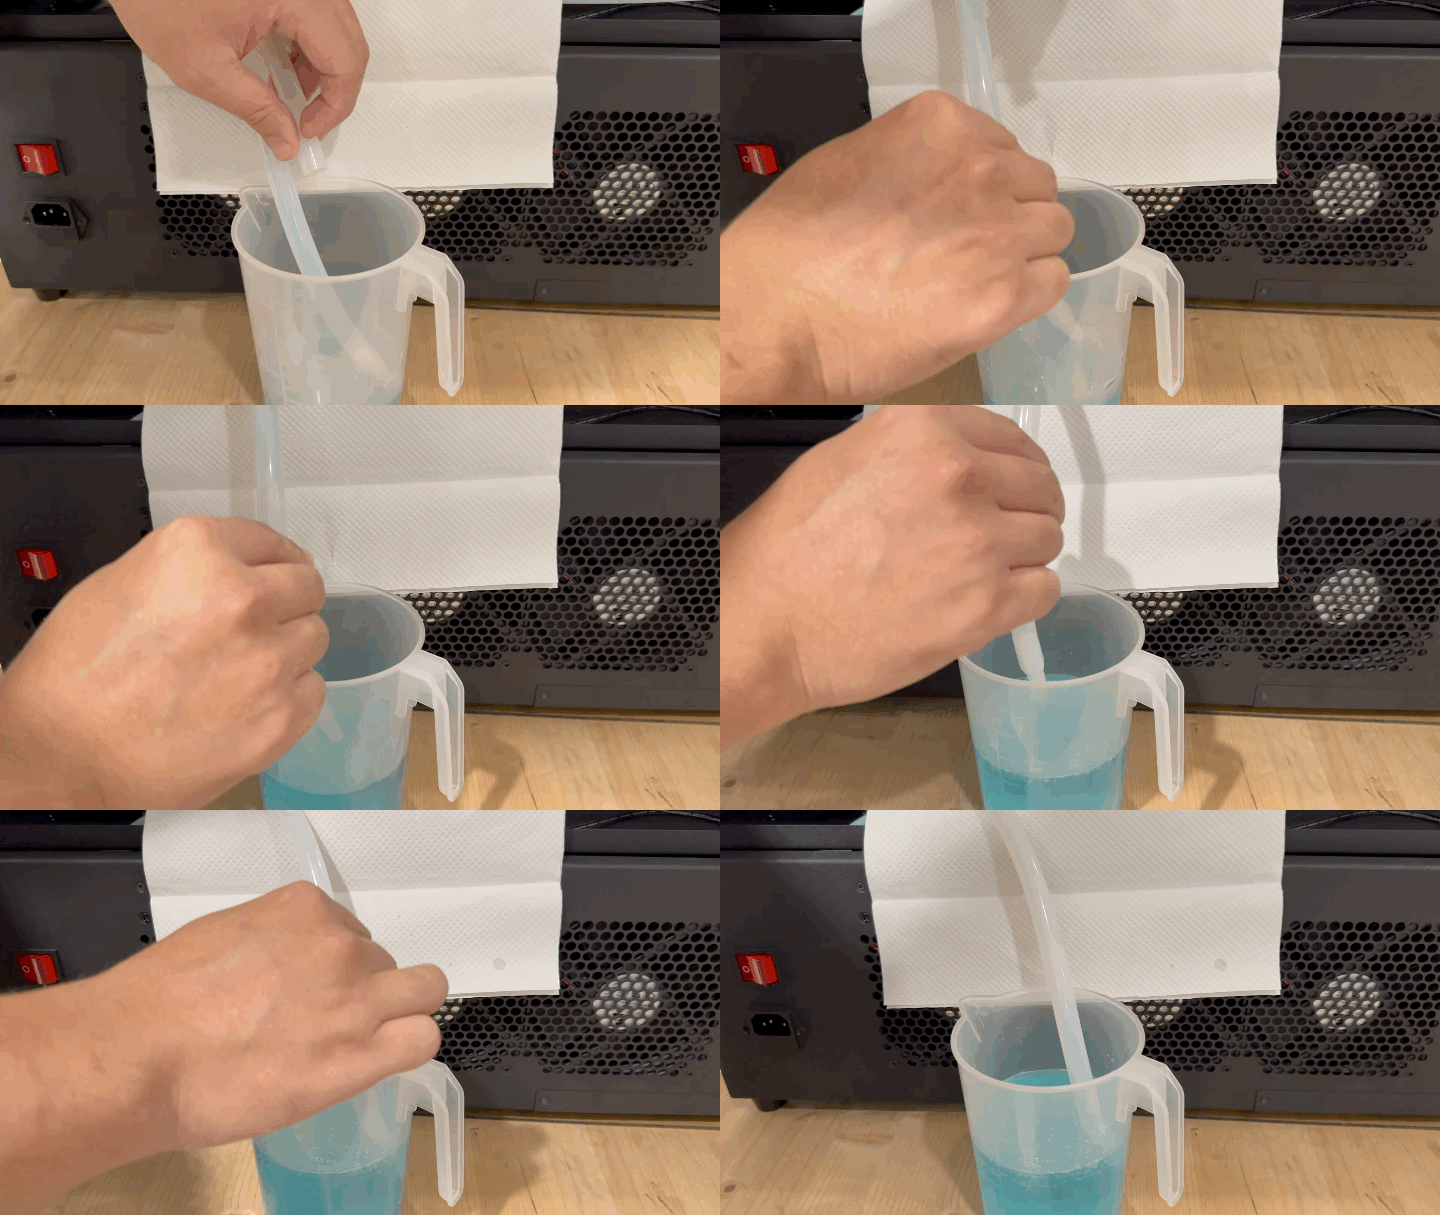
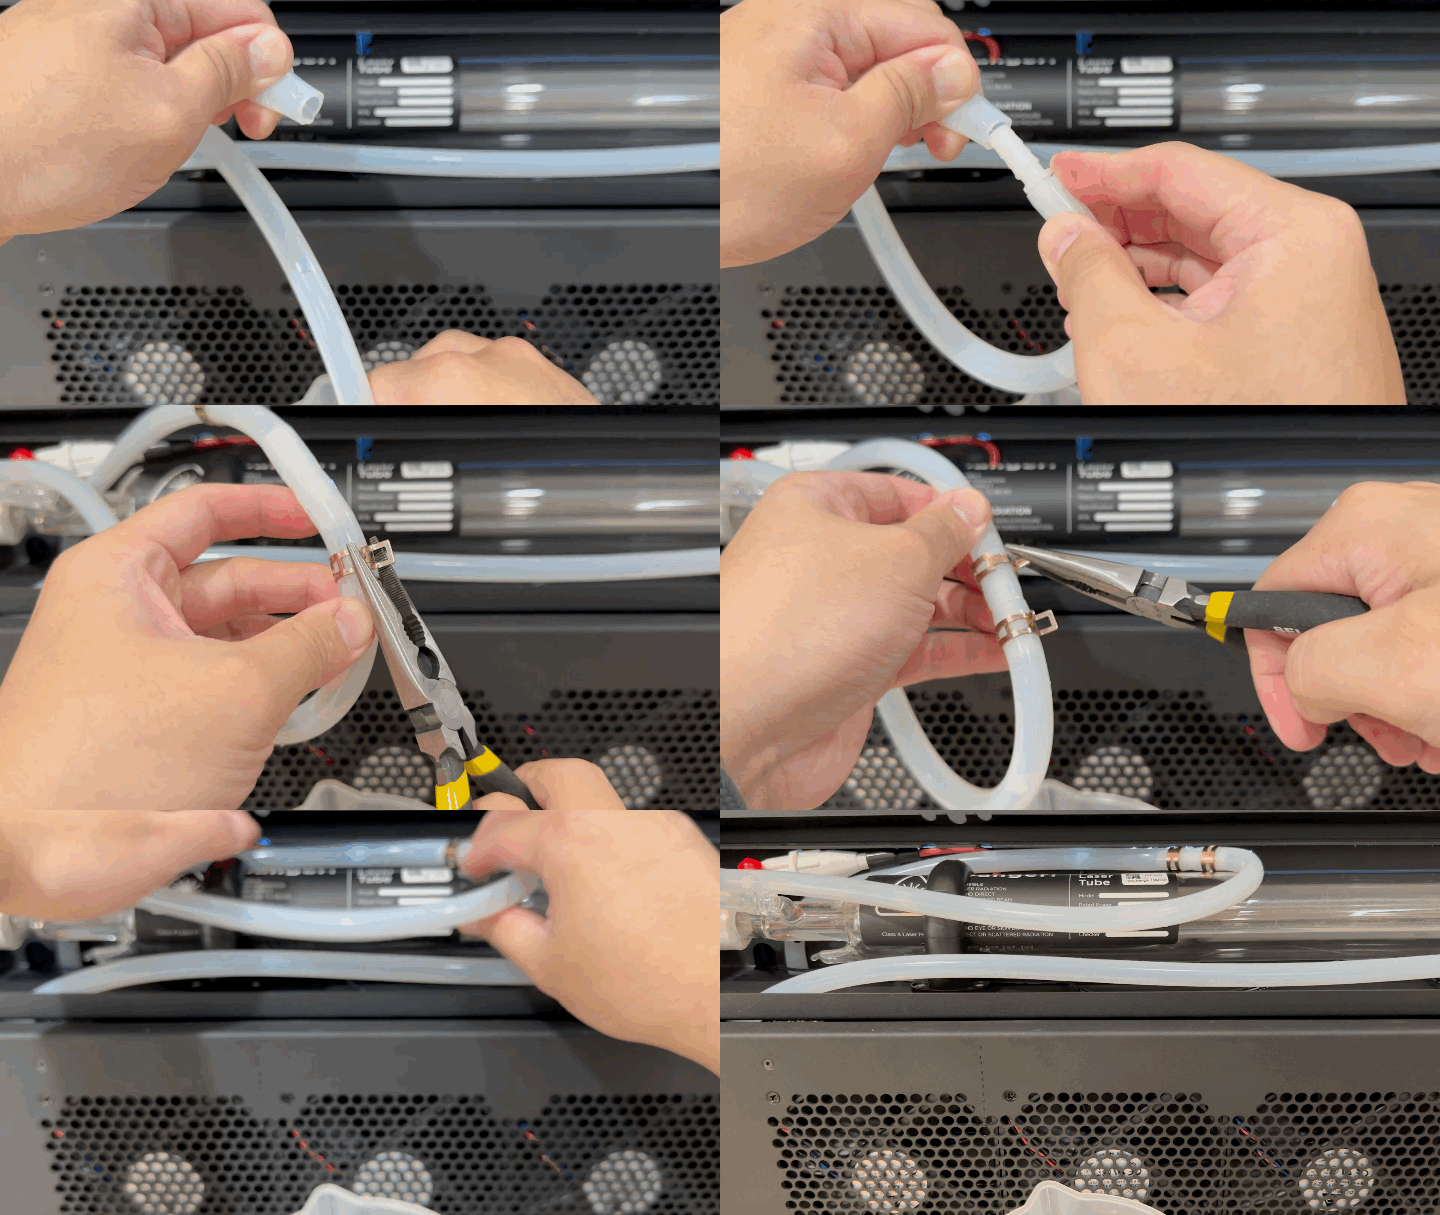
a. Drag out the hose > Move both pipe clips away from the hose connector with the needle nose pliers > Remove the joint from one of the hoses and immediately insert the hose into the water container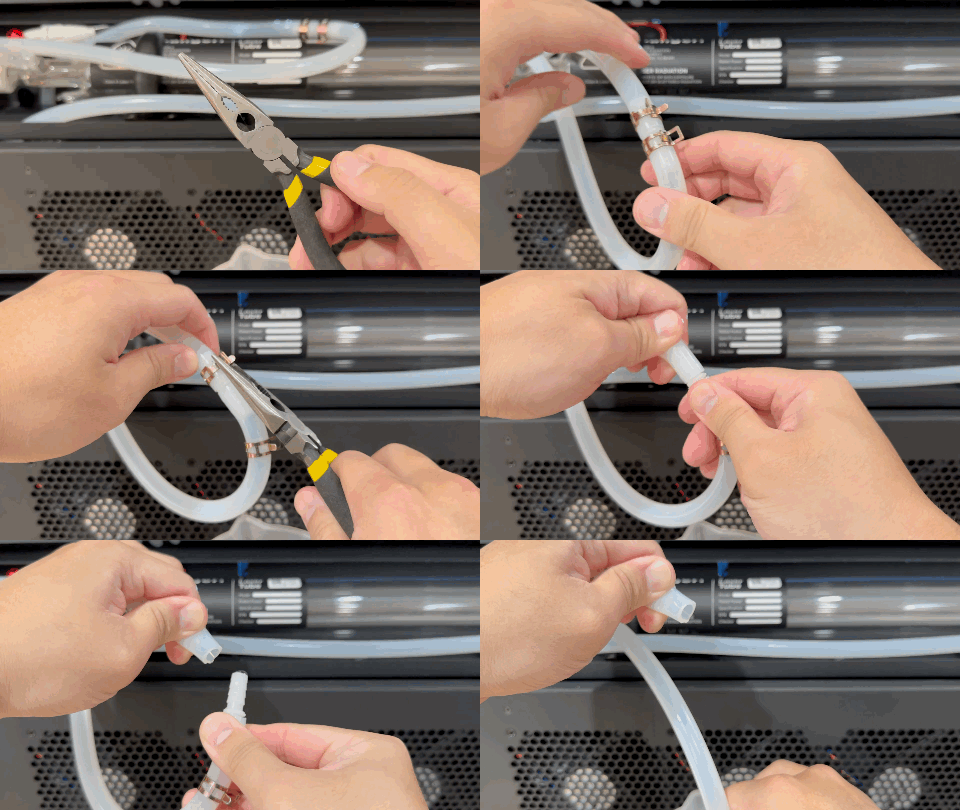
b. Lift the laser tube or blow one side of the hose to drain the water completely.
Step 5 - Place the laser tube back and put it on the hose
a. Place the laser tube back in its current position. (Skip this step if choosing not to move the tube.)⚠️ Avoid contacting the machine parts with water. If water leaks or spreads, let the machine dry completely before starting up.
b. Insert the joint on both hoses > Move both clips closer to each other to prevent leakage.
Step 6 - Connect the ground wire of the laser tube
(Skip this step if choosing not to move the tube.)To the Low-voltage side > Press down the white terminal and insert the ground wire > Release the white terminal > Gently pull the ground wire to check if it is firmly connected.Step 7 - Fix the laser tube holders
(Skip this step if choosing not to move the tube.)Ensure the distance between the laser tube and the beam combiners is around 35mm.Step 8 - Power cord and start-up
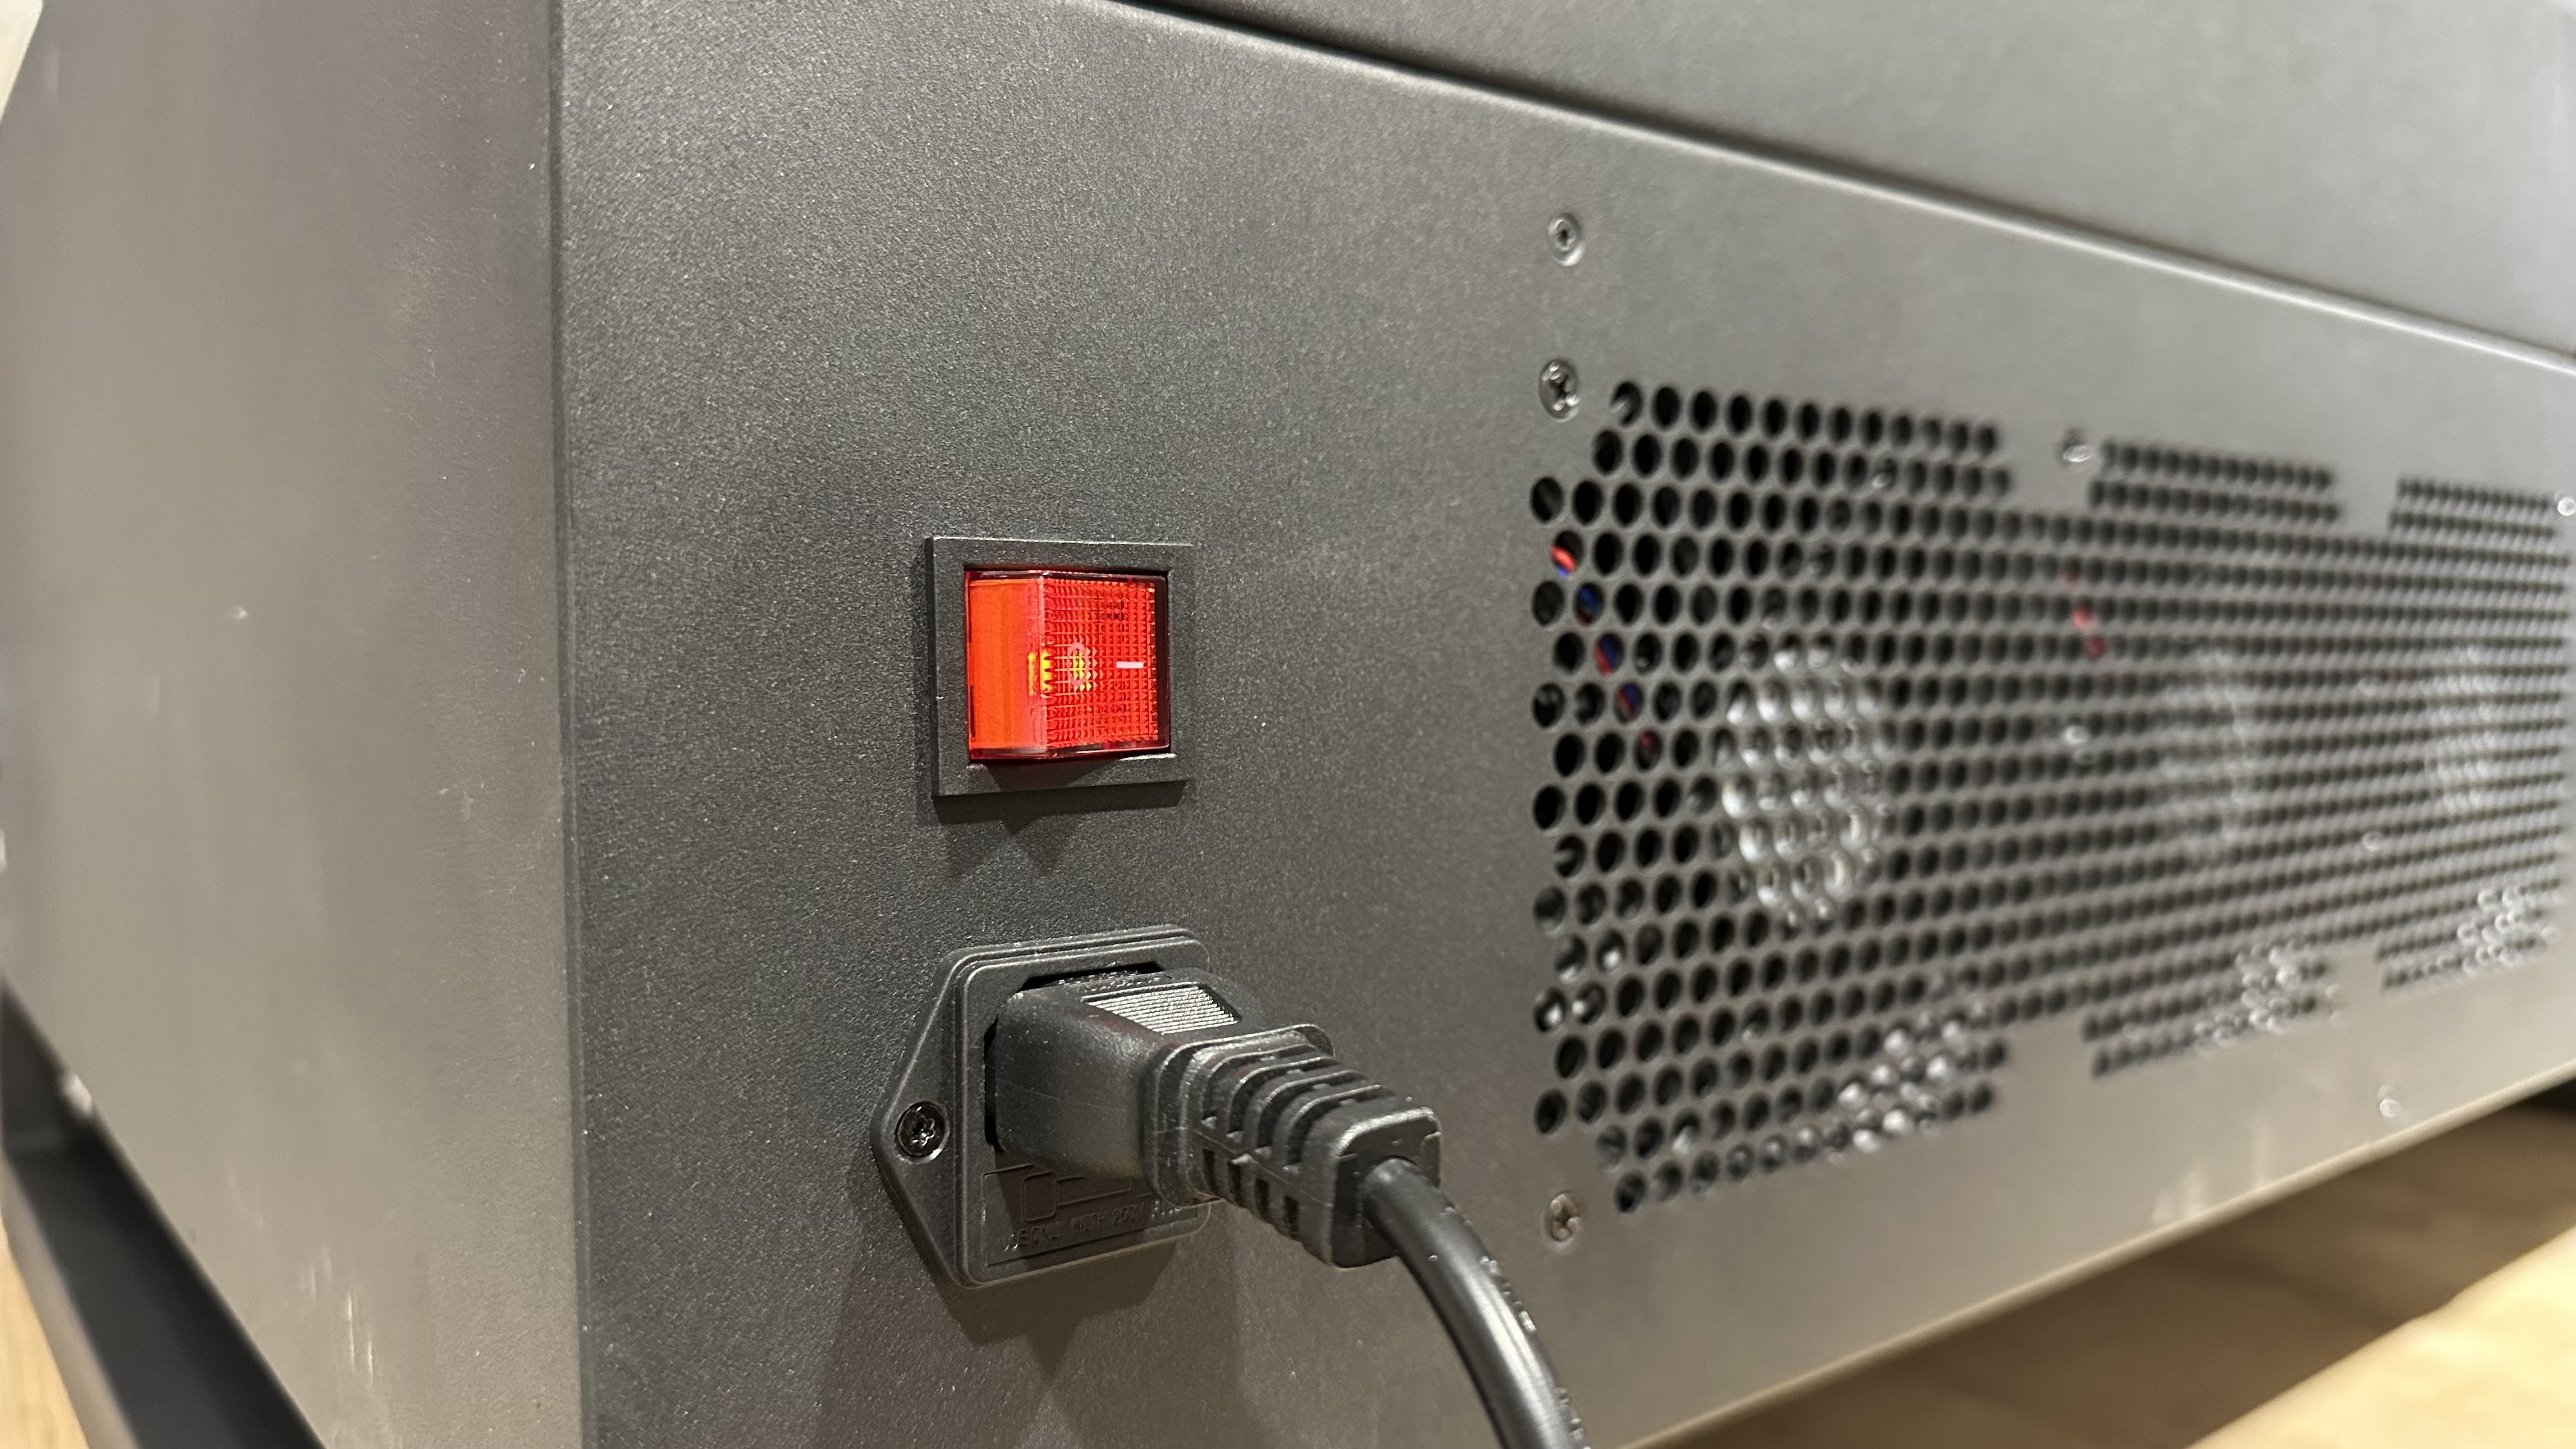
Plug the power cord and turn on the machine.Step 9 - Water pump take out
Remove the back square plate with the Torx screwdriver to inspect the water level of the tank.
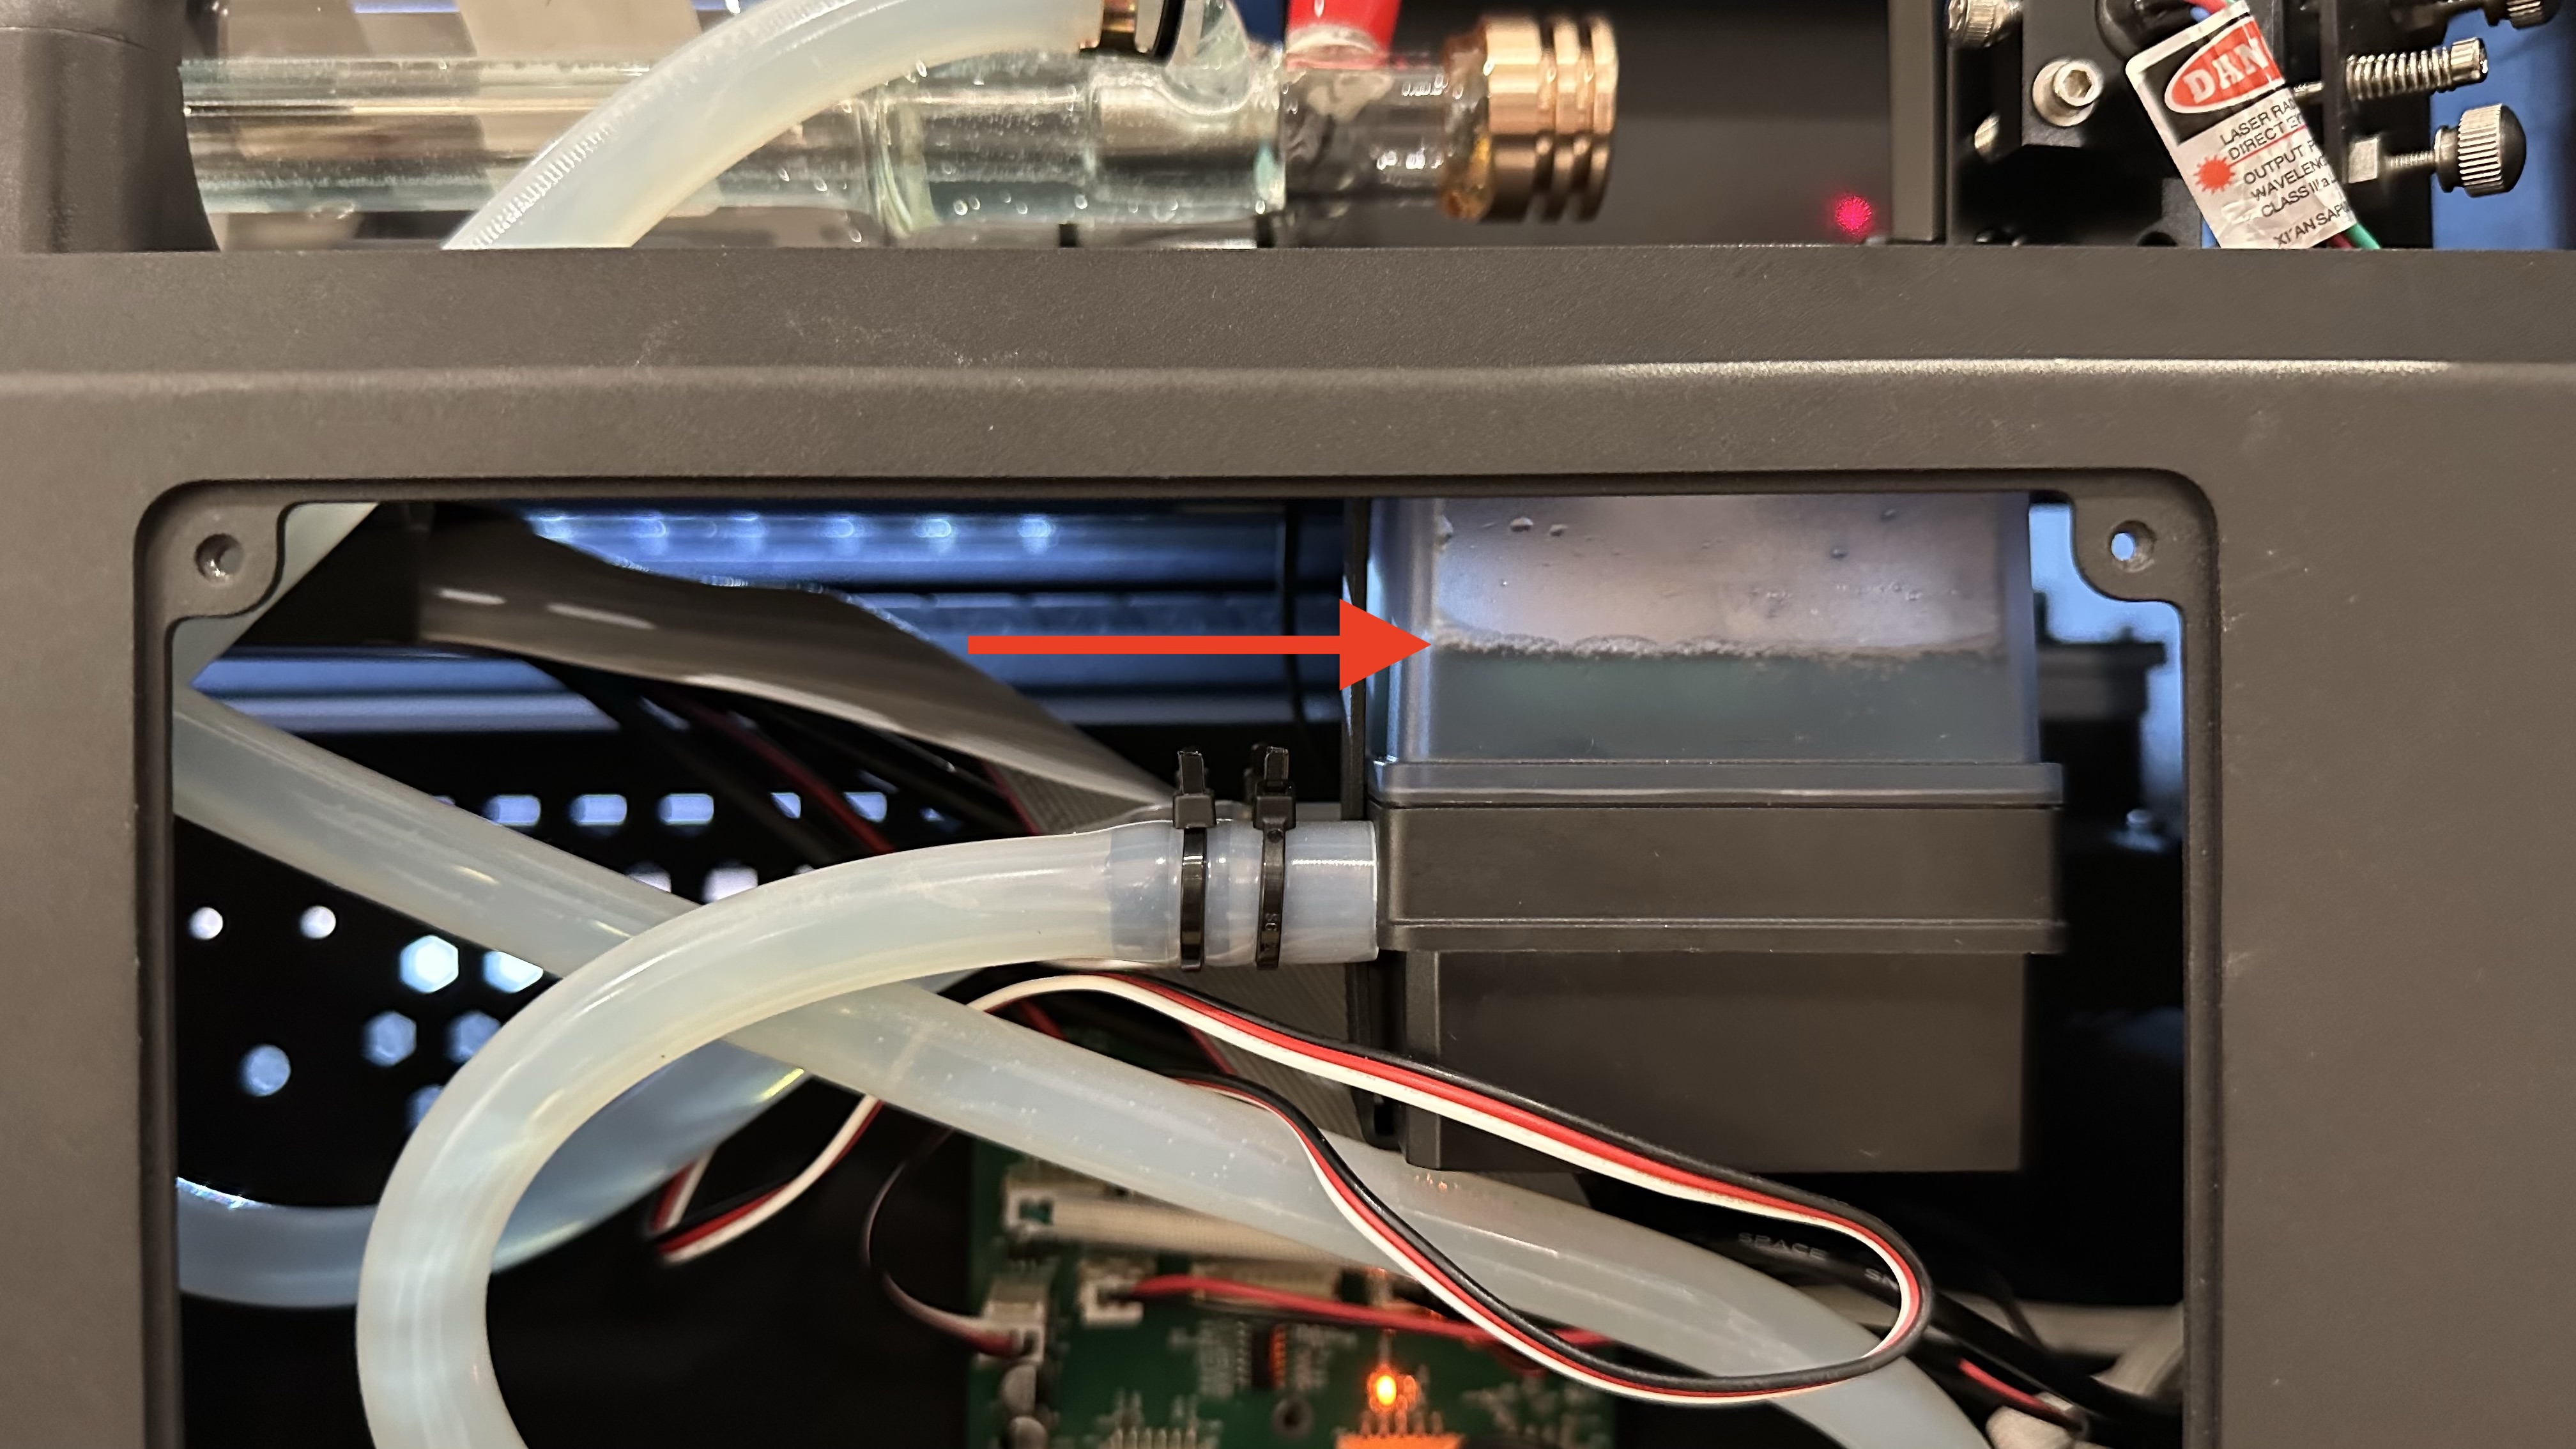
Step 10 - Water Filling
Note: 400 ml of distilled or pure water is required for filling.
a. Open the pump cap with a double-head wrench.b. Put in the funnel.
c. Pour the water in slowly and keep it 50% full.
d. Close the pump cap.
e. Go to "Maintain Mode" and wait until it finishes homing, then press the "Pump" button to turn on the water pump.
f. When the water tank's water decreases, press the "Pump" button again to turn off the pump and pour in more water until the tank is 80% full.
g. Repeat the step above until the water is 80% full and won't decrease.
Step 11 - Reassemble the Plate
Fix the plate back by tightening these four screws with a Torx screwdriver.#END
Comments
0 comments
Please sign in to leave a comment.