Your FLUX Delta+ should be connected by now. We can start loading filament and proceed to printing!
Before we start
Before we start printing, let’s get to know some basic 3D printing terms used in FLUX Studio.
QUALITY
You can choose from low, medium to high quality for your print.
RAFT
A horizontal latticework of filament that is located underneath your part, is often used to create a strong foundation on which to build the upper layers of the print.
SUPPORT
When printing an object with an overhang beyond 45°, it can sag and requires support material beneath it to hold it up.
ADVANCED
You can set advanced parameters for the printing task
PREVIEW
Preview the sliced printing process.
Preparation
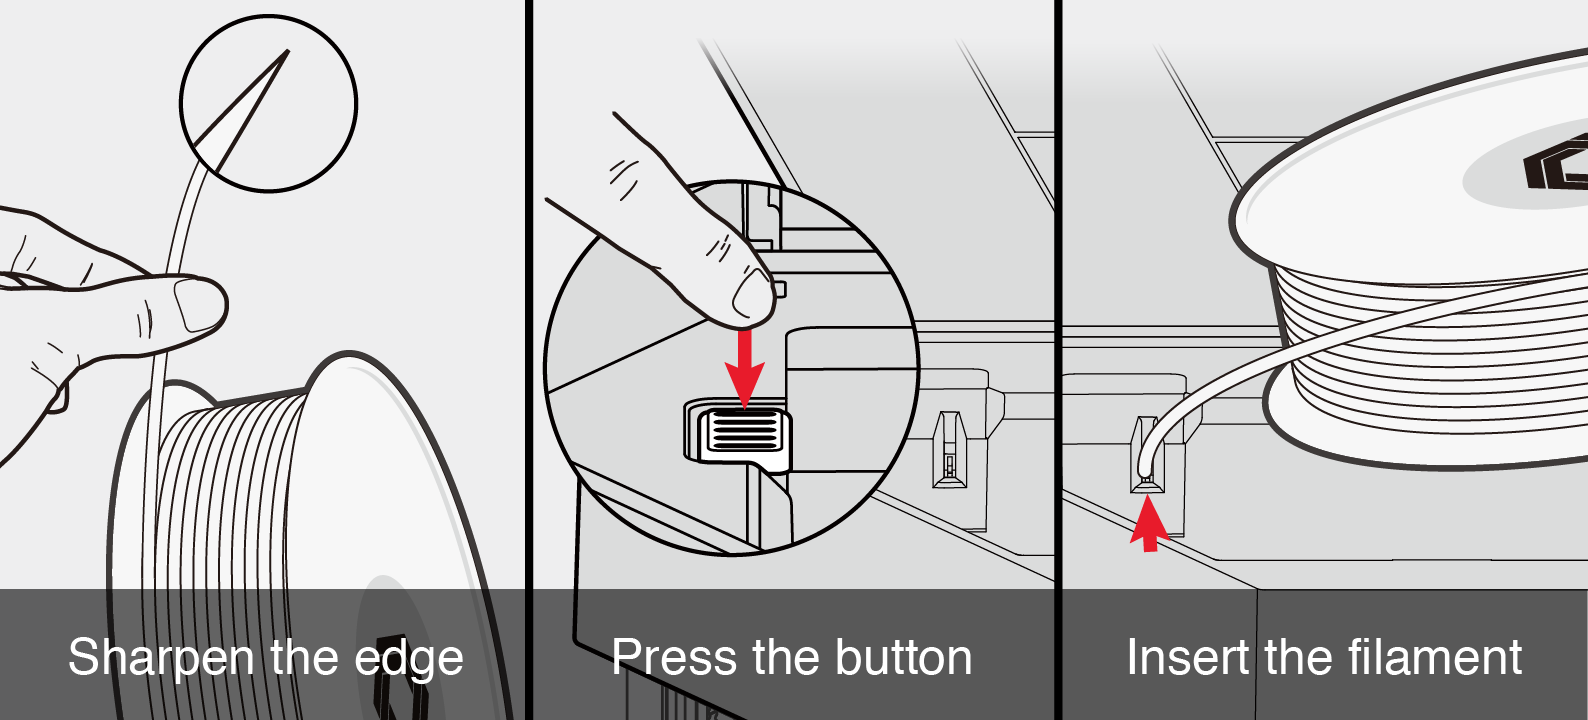
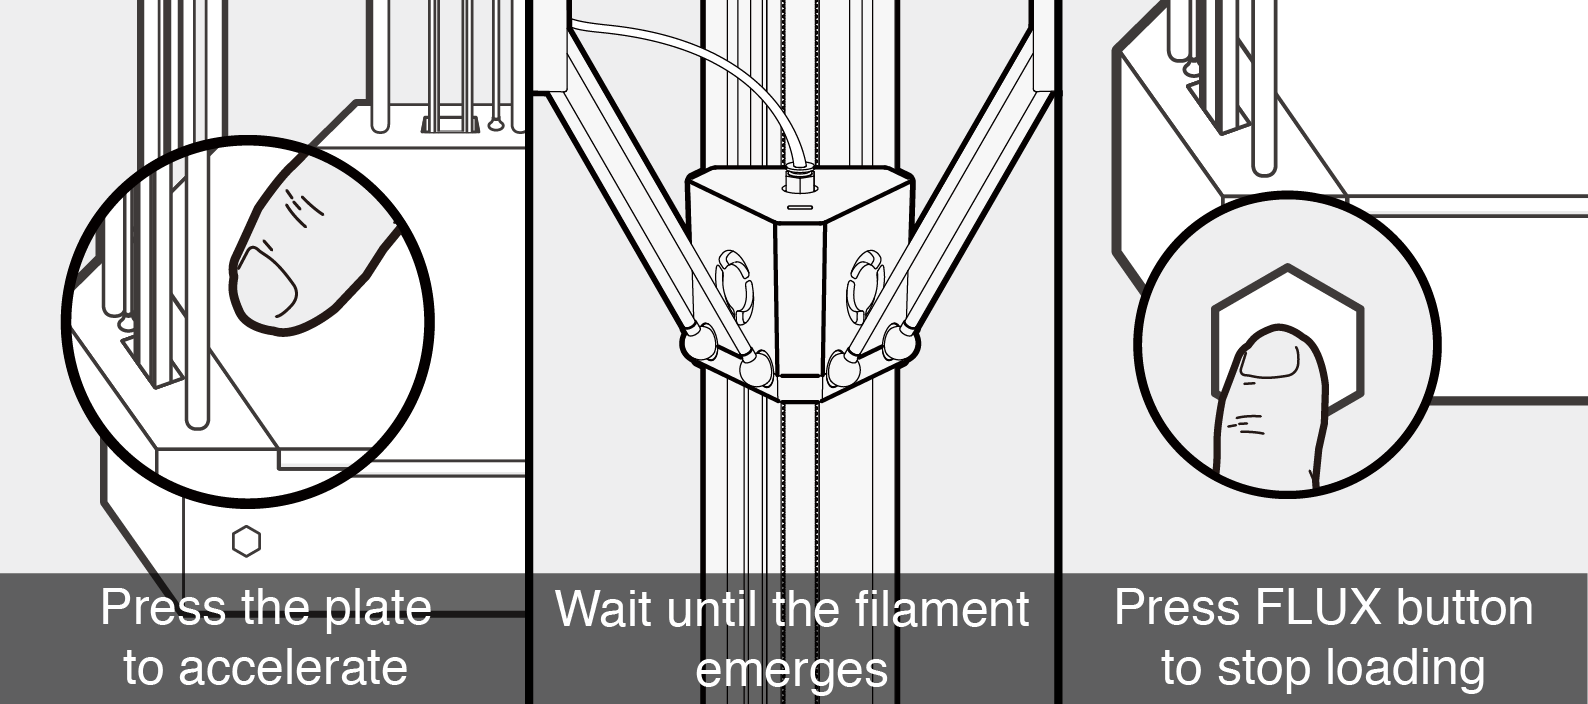
Follow the tutorial to load filament. If you skipped the tutorial, you can start again by clicking Machines > choose your device > Change Printing Material.
Follow the Steps
STEP 1 :
Place the metal base plate on the platform, and attach the magnetic print plate in the center. (don't apply glue, applying glue will decrease the adhesion)
STEP 2 :
Follow the tutorial and import the test print file. If you are not using the tutorial, simply drag the STL file into FLUX Studio, then click start.
STEP 3 :
After you click start, the printing toolhead will start heating up to 170°C. FLUX Delta+ will automatically start calibrating after the heating is complete.
- If you see error #110 or #114, please make sure you insert the upper end of the toolhead cable completely, and the cable holder is installed at the printing toolhead end.
- If the rods detached when calibrating or printing, try rotating the direction of the toolhead cable, and make sure that the cable plug is in the front. To make sure the parts are correctly installed, run a movement test by clicking Machines > choose your device > Commands > Run movement tests.
The printing toolhead will heat again after calibration, then start the printing task.
The first layer is the key process, please watch closely when printing the first layer, make sure that the print is intact, and not dragged by the printing toolhead. If the print detached from the plate, please stop the task and remove the PLA from the plate before starting again by double-clicking the button.
STEP 4:
If the first layer is attached well, you can sit back and relax.
STEP 5:
When the task is done, pick up the magnetic print plate and peel the print off carefully.
For more printing tips, please refer to this article.
Comments
0 comments
Please sign in to leave a comment.