Thank you for ordering FLUX Delta+!
This guide will help you take you through the basic settings of the machine and help you set up.
Make sure to watch the Unboxing Guide video! Please turn on the subtitles.
Before the Machine Arrives...
1. Look for the 3D model you want to print (.stl)
- Thingiverse and MyMiniFactory are the most popular communities for discovering 3D printable things. You can know how popular a model is by the number of made it has.
2. Join FLUX Forum
- It is an internatinal forum for FLUX Delta and Delta+ users, feel free to ask anything regarding your machine, you will get friendly responses!
Steps to Unbox
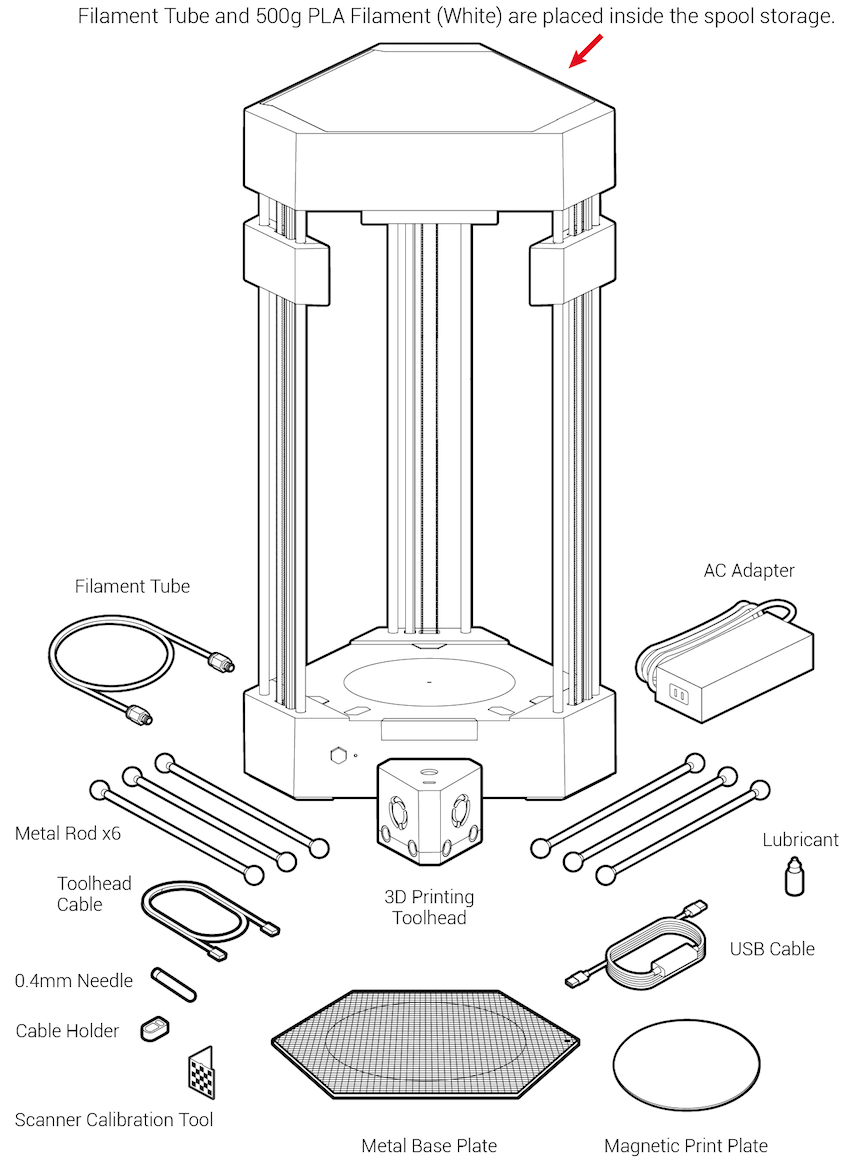
0. What's in the box
- Refer to the diagram in the Quick-Start guide, check if the content is correct.
- Here's how to use the FLUX button and what how each indicator means:

1. Download and install FLUX Studio 0.9.0 and up
- Please make sure your OS is Windows 7 / OSX 10.10 / Ubuntu 14.04 or higher.
2. Set up connection
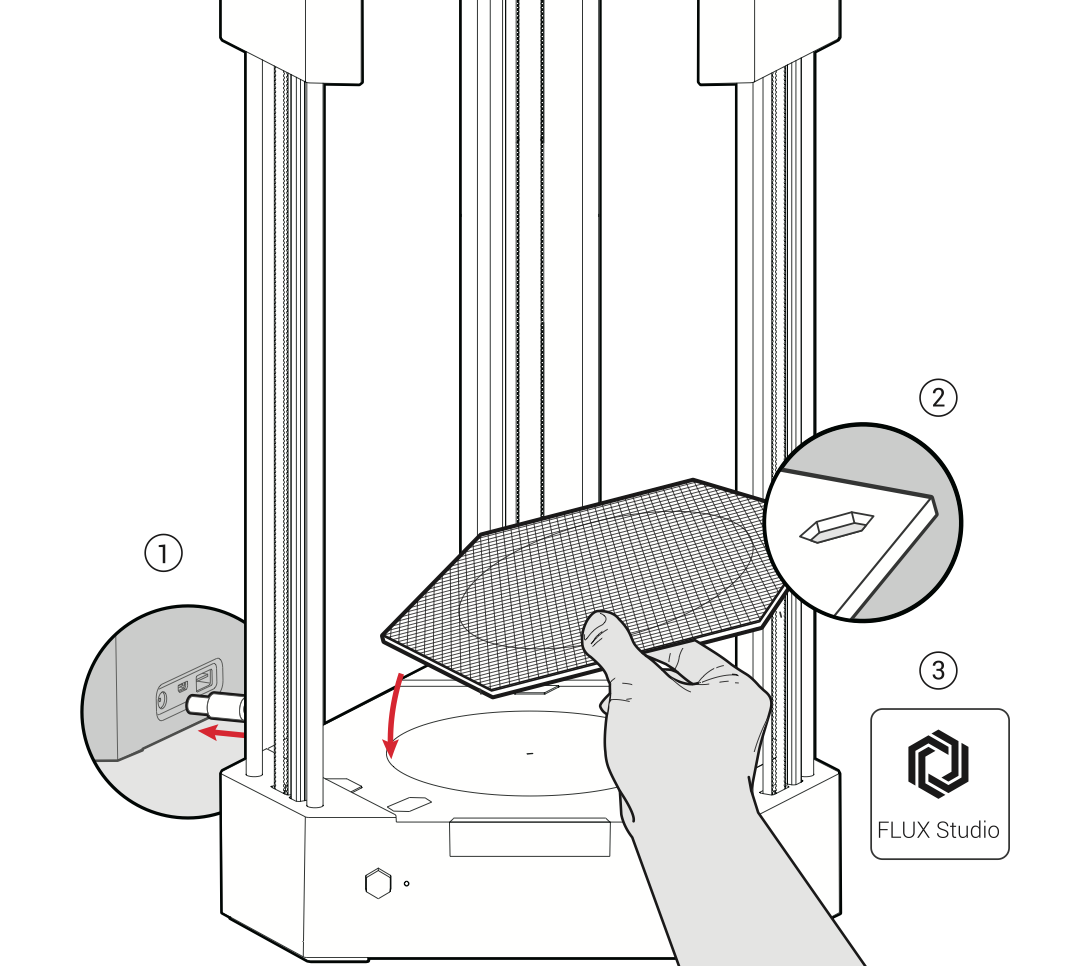
- (a) Plug in and power on. The machine will be at home position when it’s ready.
- (b) Place the metal base plate on the turntable in the right direction with the grid facing up.
- (c) Set up a wired (USB) or wireless (Wi-Fi) connection by following the instructions in FLUX Studio.
- (d) The default Wi-Fi password is flux-delta.
- If you skipped the setup before or wanted to change the settings, do so by clicking Menu > Machines > Add a New Machine.
- We recommend that you first set up the connection with connecting to FLUX Delta+ as a WiFi station, the default password is flux-delta (note: you'll be off to internet temporarily)
- Wi-Fi setting and troubleshooting:
- Make sure your router doesn't block connection between LAN and WLAN, and your FLUX Delta+ and laptop is connected to the same router.
- FLUX Delta+ only supports 2.4 Ghz Wi-Fi.
- The encryption of the router is recommended to be WPA2-PSK or WPA2-PSK/WPA-PSK Mixed.
- The distance between the router and your FLUX Delta+ should be within 5 meters (16 ft.)
- Old routers (more than 8 years) might not work.
- If the software couldn't find the network, please go to this link; if the network doesn't connect, please go to this link.
- If you see "Cannot detect FLUX Delta+ through Wi-Fi", please go to this troubleshooting.
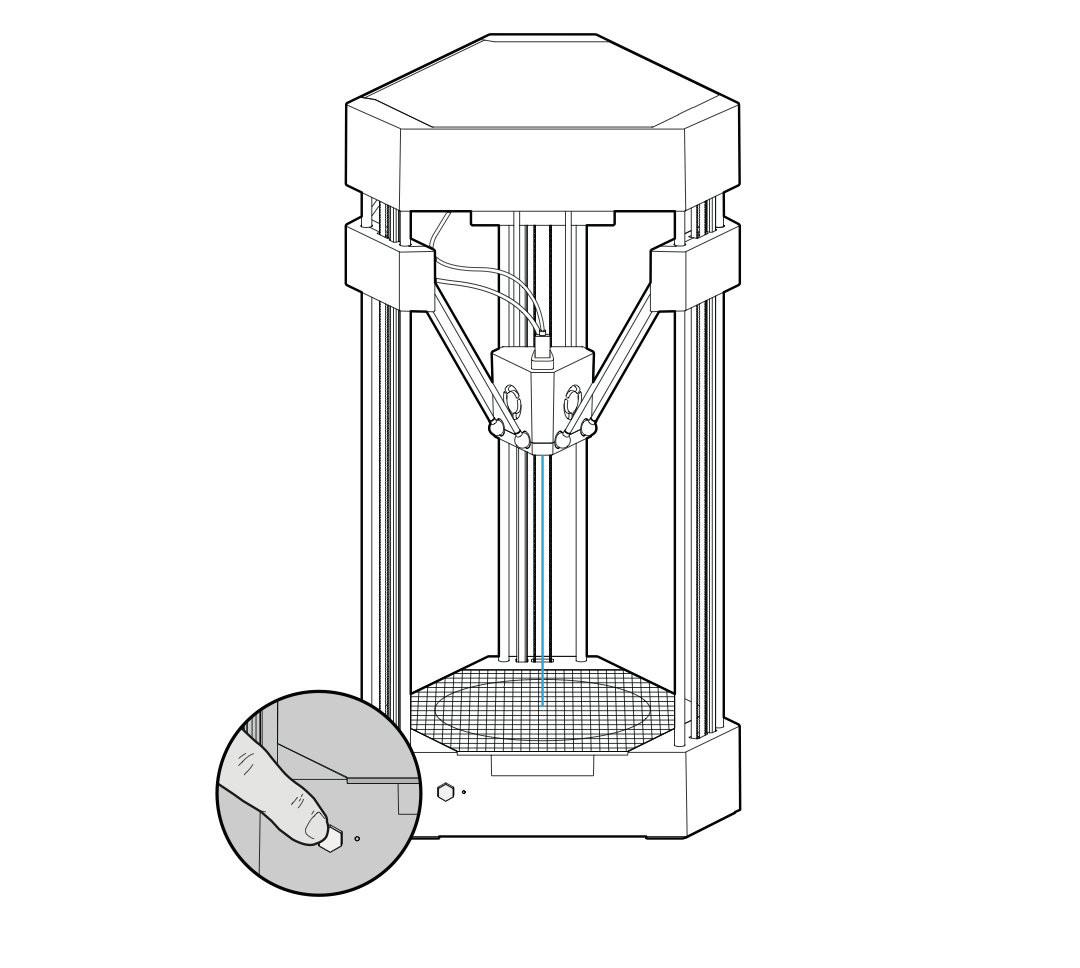
- (a) Apply lubricant on the axes beneath the carriages, slide the carriages down and up to spread the lubricant thoroughly inside the carriages. Wipe off the extra lubricant on the axes.
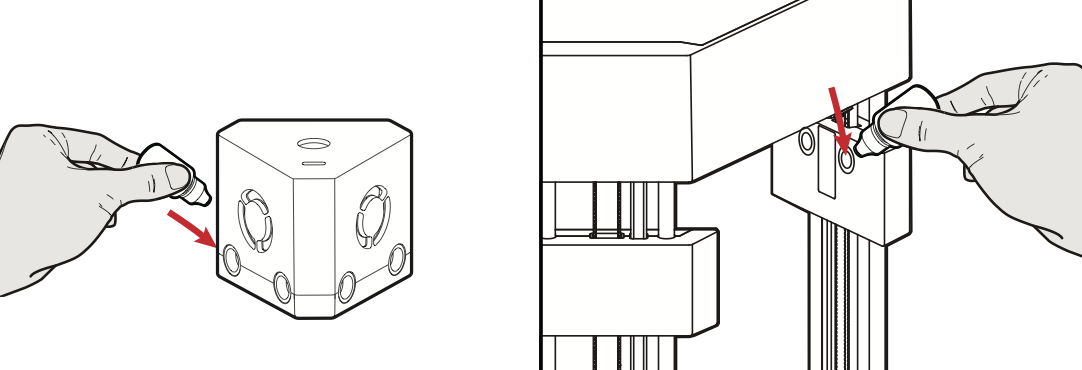
- (b) Lubricate the joints by dripping the lubricant to the black sponges on the carriages and the printing toolhead.
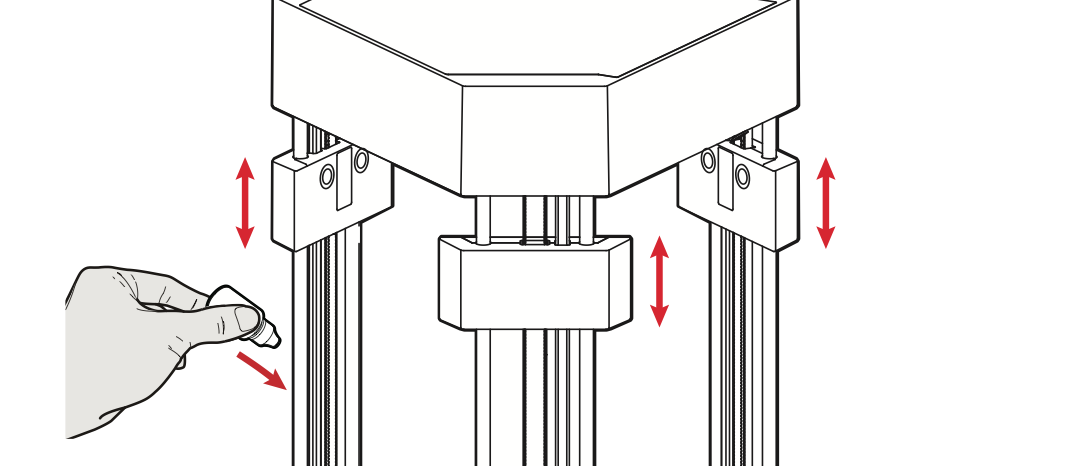
- To ensure the performance, please repeat (a) and (b) after every 200 hours and 50 hours of usage.
- You can also refer to this article for alternative lubrication methods.
4. Instal printing toolhead
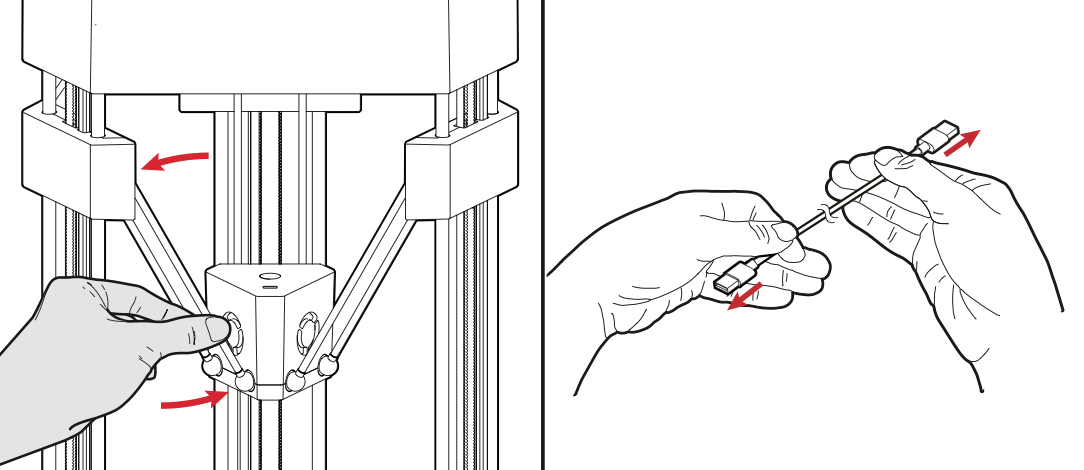
- (a) Connect the 6 metal rods to the carriages and install the printing toolhead at the center.
- (b) Straighten the toolhead cable, make sure that it remains flexible to avoid high resistance during operation.
- (c) Insert one end of the cable to the port at the upper case, insert the other end through the cable holder before plugging into the printing toolhead.
- (d) Install the filament tube by repeating the previous steps.
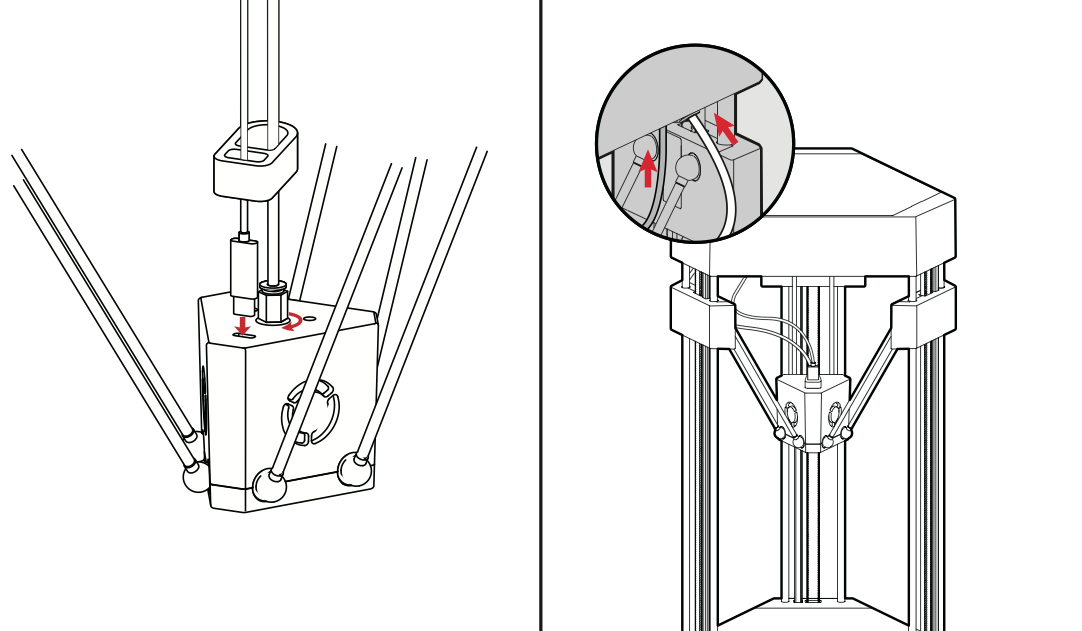
- Make sure the cable holder is at the very bottom, touching the upper case of the toolhead.
- The cable port of the toolhead should be facing the front of the machine for least resistance.
5. Install print plate and filament
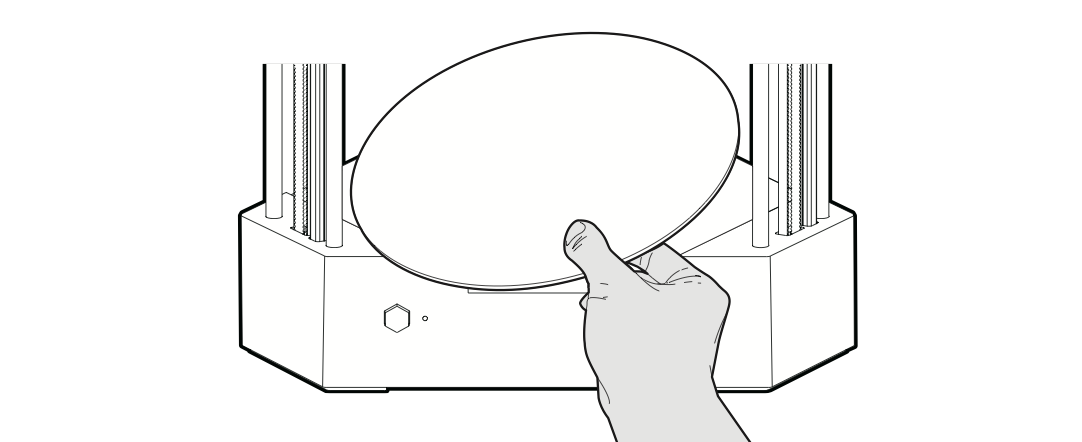
- (a) Attach the magnetic print plate to the center of the metal base plate.
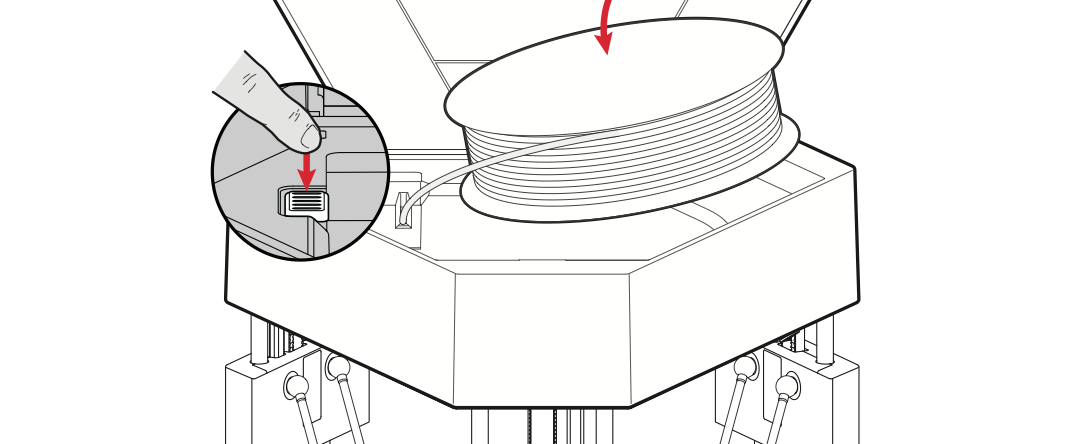
- (b) Take out the PLA spool from the plastic bag. Pull out the loose end of the spooled filament and sharpen the tip, grasp the free end and be careful not to let the filament loosen or tangle on the spool.
- (c) Press down on the filament latch and insert the loose end to the filament inlet, release the latch to lock the filament in place.
Please note:
- You can also refer to this article for alternative adhesion methods.
- When removing the filament from the spool storage, please insert the loose end to the hole on the spool.
6. Load filament, start printing test
- (a) Follow the instructions in FLUX Studio to start loading filament automatically.
- (b) Wait until you begin to see plastic emerging from the printing toolhead nozzle, then press the FLUX button to finish loading.
- (c) Run movement tests and start printing test by following the steps in the software.
- If movement tests failed, please follow this guide.
- If you skipped the tutorial, click Machines > choose your device > Change Printing Material > Load Filament.
- When removing the filament from the spool storage, please insert the loose end to the hole on the spool.
- You can always start the tutorial again or the printing test by clicking Help > Start Printing Tutorial.
- Never reach inside the work area while FLUX Delta+ is in operation to prevent injuries. The machine will automatically stop when it detects any error, please follow the troubleshooting steps in the software before start operating again.
7. Print some awesome stuff!
- To print like a king, please go to this article.
FAQ and Links
Got problems? Don't worry!
Most problems that you have are already faced by other users, some are common 3D printing problems while some are only limited to FLUX Delta+. Please refer to to the following links and discussions to enhance your user experience.
Help Center
- FLUX Troubleshooting: It's very likely that you can find answers here.
- FLUX Support Request:Submit a request to our support staff when our Help Center can't solve your problem or when the machine is malfunctioning.
Features Walkthrough
- Help/ Ch1: Wi-Fi Setup Guide
- Help/ Ch2: Printing Like a King
- Help/ Ch3: Engraving with Laser
- Help/ Ch4: Scanning the reality
- Help/ Ch5: The Drawing Robot
Wi-Fi Setup
3D Printing
- Help/ Keep everything lubricated
- Help/ Plate adhesion improving
- Help/ Use USB to print / engrave / draw
- Help/ Machine Maintenance
- Help/ #121 Filament not detected
- Help/ #110 Toolhead not detected
- Help/ #114 Toolhead bad connection
雷射雕刻
Comments
0 comments
Article is closed for comments.