Recommended Timing
Depending on the power, hours of usage, room temperature, water temperature, and other conditions.
When to replace the tube?
-
The degradation of the laser tube.
-
The failure of the laser tube, which has no laser beam output as well as generates a cracking sound. The Laser tube is classed as consumable, and degradation is expected due to the use of power, storage time, and other factors. The higher the power setting, the faster the laser tube degradation.
Video
Preparation Items
| Self-preparation | In the accessory box | In the laser tube package |
|
5|Needle nose pliers |
1|Torx screwdriver | 8|Gloves |
| 6|Paper towel or rag | 2|3mm Allen key | 9|Aluminum box |
| 7|75%~99% alcohol | 3|2.5mm Allen key | 10|Conductive fabric tape |
| 17|Water container | 4|Double-head wrench | 12|Aluminum box screws*2 |
| 18|Scissors | 11|Funnel | 13|Water pipe |
| 20|Vacuum cleaner or high-pressure spray gun *If you have one, it is better. | 14 | Pipe clip*2 | |
| 15|Hose connector | ||
| 16|Pipe plug*4 | ||
|
19|Laser tube |
Replacement Steps
0. Unplug the power and open the chassis
- Please unplug the power cord first, then replace the laser tube.
- Please use the Torx screwdriver to remove 2 screws on both sides of the back cover and lift the cover.
- You can remove the dust from the back chassis first and then replace the laser tube. Use a vacuum cleaner or high-pressure spray gun to remove the dust from the rear chassis, and then use a paper towel or rag with alcohol to wipe the dirty area and wait for the chassis to dry before proceeding with the next operation.
- The laser tube has two ends. The high-voltage ("High-voltage") side is near the screen and the low-voltage ("Low-voltage") side is near the reflective mirror.
- Please put a rag or paper towel on both sides of the high and low voltage to avoid damage to the machine due to water seepage.
1. Disconnect the laser tube wires:
a. Snip & detach
If this is not your first time replacing a tube, please skip this step and remove the aluminum directly with a 2.5mm Allen key.
- Please wear the provided gloves
- Remove the cable wrapper
- Snip the copper part with scissors
- Detach the white connector on the high-voltage side
b. Disconnect the laser tube wires
Press the white terminal and pull out the ground wire
c. Remove the ground wire on the high-voltage side
Use the 2.5mm Allen Key to loosen the screws in the EMI filter. Next, put out the ground wire connected to the laser tube.
2. Loosen the laser tube holders
Use the 3mm Allen Key to loosen a total of 4 screws on the laser tube holders.
3. Detach the water pipes
a. Move to the low-voltage side.
- Push the clamp outward with the Needle nose pliers
- Remove the hose connector and put it aside for later use
- Remove the pipe clip on the short hose and set it aside for later use
- Make sure that the two water pipe openings are inserted into the pipe plug to avoid water leakage.
b. Detach the water pipe from the high-voltage side
The laser tube can move from the tube holder seats to the back cover, it will be easier to pull out the pipe.
c. Insert the pipe plug after detaching
d. Insert the supplied water pipe and plug it into the water inlet of the laser tube to avoid water leakage
⚠️ Avoid contacting the machine parts with water. If water leaks or spreads, let the machine dry completely before starting up.
4. Remove the laser tube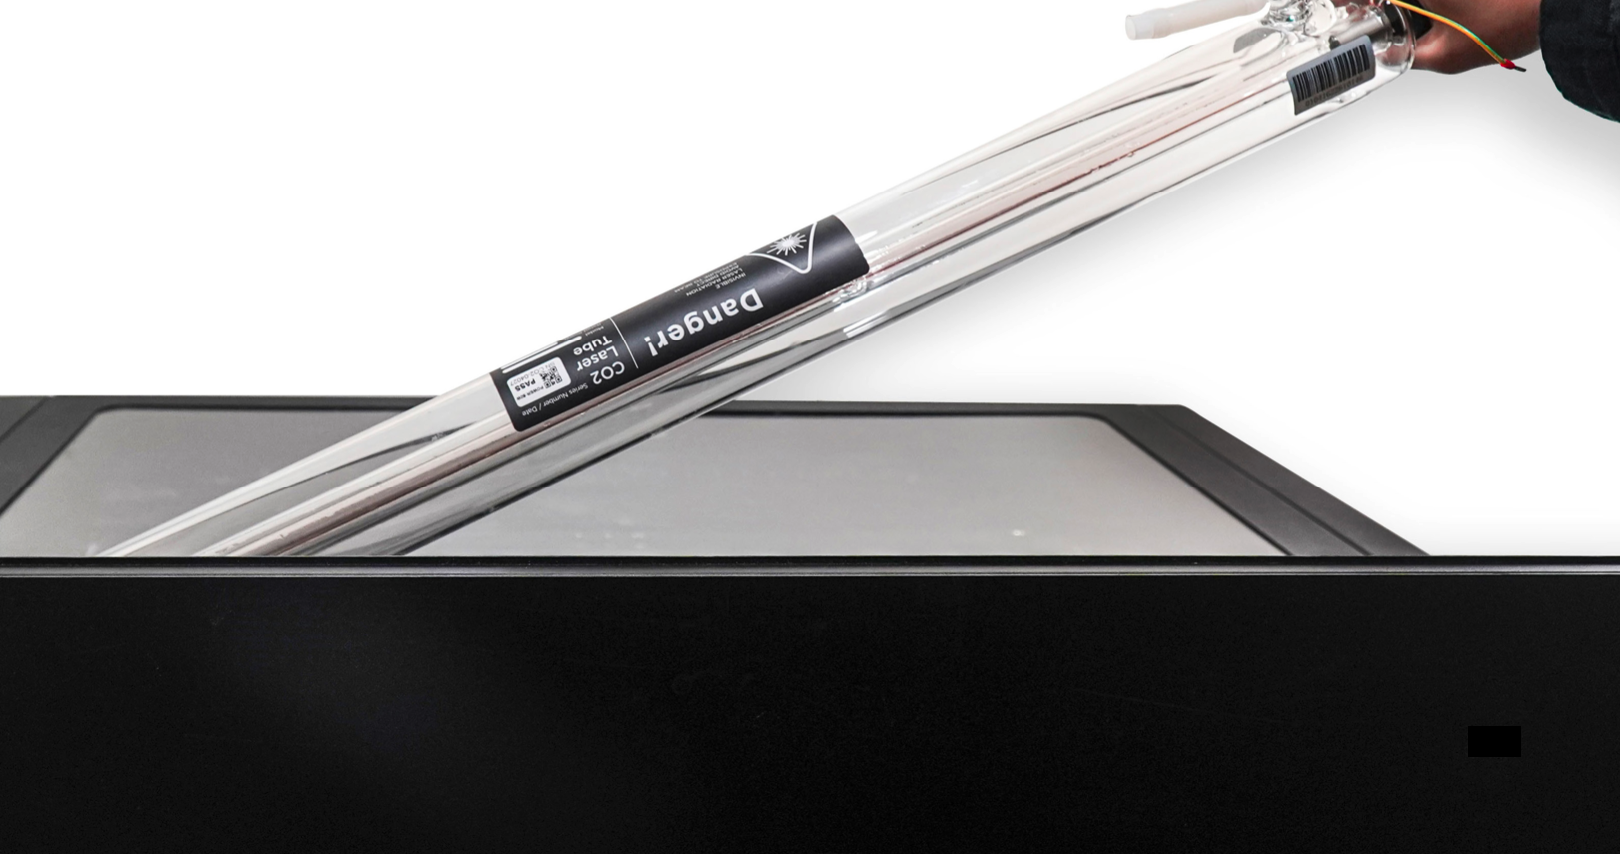
5. Place the new laser tube and water hose
a. Place the laser tube according to the picture
b. Remove the water pipe plug on the high-voltage side and attach the water pipe to the laser tube
c. Move to the low-voltage side > Remove the pipe plug > Attach the pipe clip to the shorter water pipe > Insert the hose connector > Use the needle nose pliers to move pipe clips towards the connecting side to prevent water leakage.
d. Press down the white terminal and insert the ground wire > Release the white terminal > Gently pull the ground wire to check if it is firmly connected.
6. Apply conductive fabric tape; install the aluminum box and Grounding wire connection
a. Connect the white connector at the high-voltage side and apply the conductive fabric tape on the laser power supply’s connector
b. Put the white connector into the aluminum box, mount it on the cover, and tighten the screws with a 2.5mm Allen key. (The box can be put randomly in the space as long as the cable and wires are not bent or twisted.)
c. Insert the ground wire on the high-voltage side of the laser tube into the position of the screws on the EMI filter > Tighten the screw.
7. Tighten the laser tube holders back
a. Place the laser tube in position, leaving a finger distance between the tail end, about 15mm from the laser tube end to the first reflective mirror > Make sure there are no folds or kinks of the water hoses
b. Use the 3mm Allen Key to tighten a total of 4 screws on the laser tube holders > Gently shake the laser tube to ensure it will not shift.
8. Plug in the power cord and start the machine
After confirming the installation is correct, you can plug in the power cord and start the engine.
9. Take out the water pump
Use a Torx screwdriver to loosen four screws on the water pump cover > Take out the water pump.
10. Adding the water
- Use the double head wrench to open the water pump cap
- Put in the funnel
- Fill the water pump with distilled water
- Click “MAINTENANCE” on the screen
- Click “Pump” after the laser head has finished the X and Y-axis homing.
- The cooling water will start to enter the laser tube, and the water level of the water pump will drop. Keep adding water until the water pump level reaches 80% of the water tank and the water level no longer drops due to the addition into the laser tube.
11. Tighten the water pump cap and cover back
- Use the double head wrench to tighten the water pump cap back
- Place the pump in its original place
- Tighten the four screws of the water pump cover back with the Torx screwdriver.
⚠️
1. Make sure there is no folds or kinks of the water hoses to affect the water flow.
2. Please use distilled water to avoid impurities affecting the water-cooling effect.
3. Too many air bubbles inside the laser tube will affect the heat-dissipation efficiency. It is recommended to fill the water to more than 80% full or press the water hose when adding water, so it is less likely to produce air bubbles.
4. Please observe the water level carefully to avoid overflowing.
5. Please do not touch the area near the high-voltage side of the laser tube after plugging the power cord in to avoid electric shock.
6. When using the "MAINTENANCE" page, avoid touching the laser switch or putting your hand at the laser tube tail end.
7. If the water pump cannot be activated, please contact your reseller.
8. After moving the laser tube, Optical Path Alignment has to be conducted.
Comments
0 comments
Please sign in to leave a comment.