Description:
The Power Curve Adjust function is a tool for adjusting the performance of the laser machine.
As the operating environment may vary, such as in homes, offices, malls, and other settings, this feature was designed to help the machine adapt to different conditions and stabilize the laser output from different use environments.
As the operating environment may vary, such as in homes, offices, malls, and other settings, this feature was designed to help the machine adapt to different conditions and stabilize the laser output from different use environments.
When to Adjust?
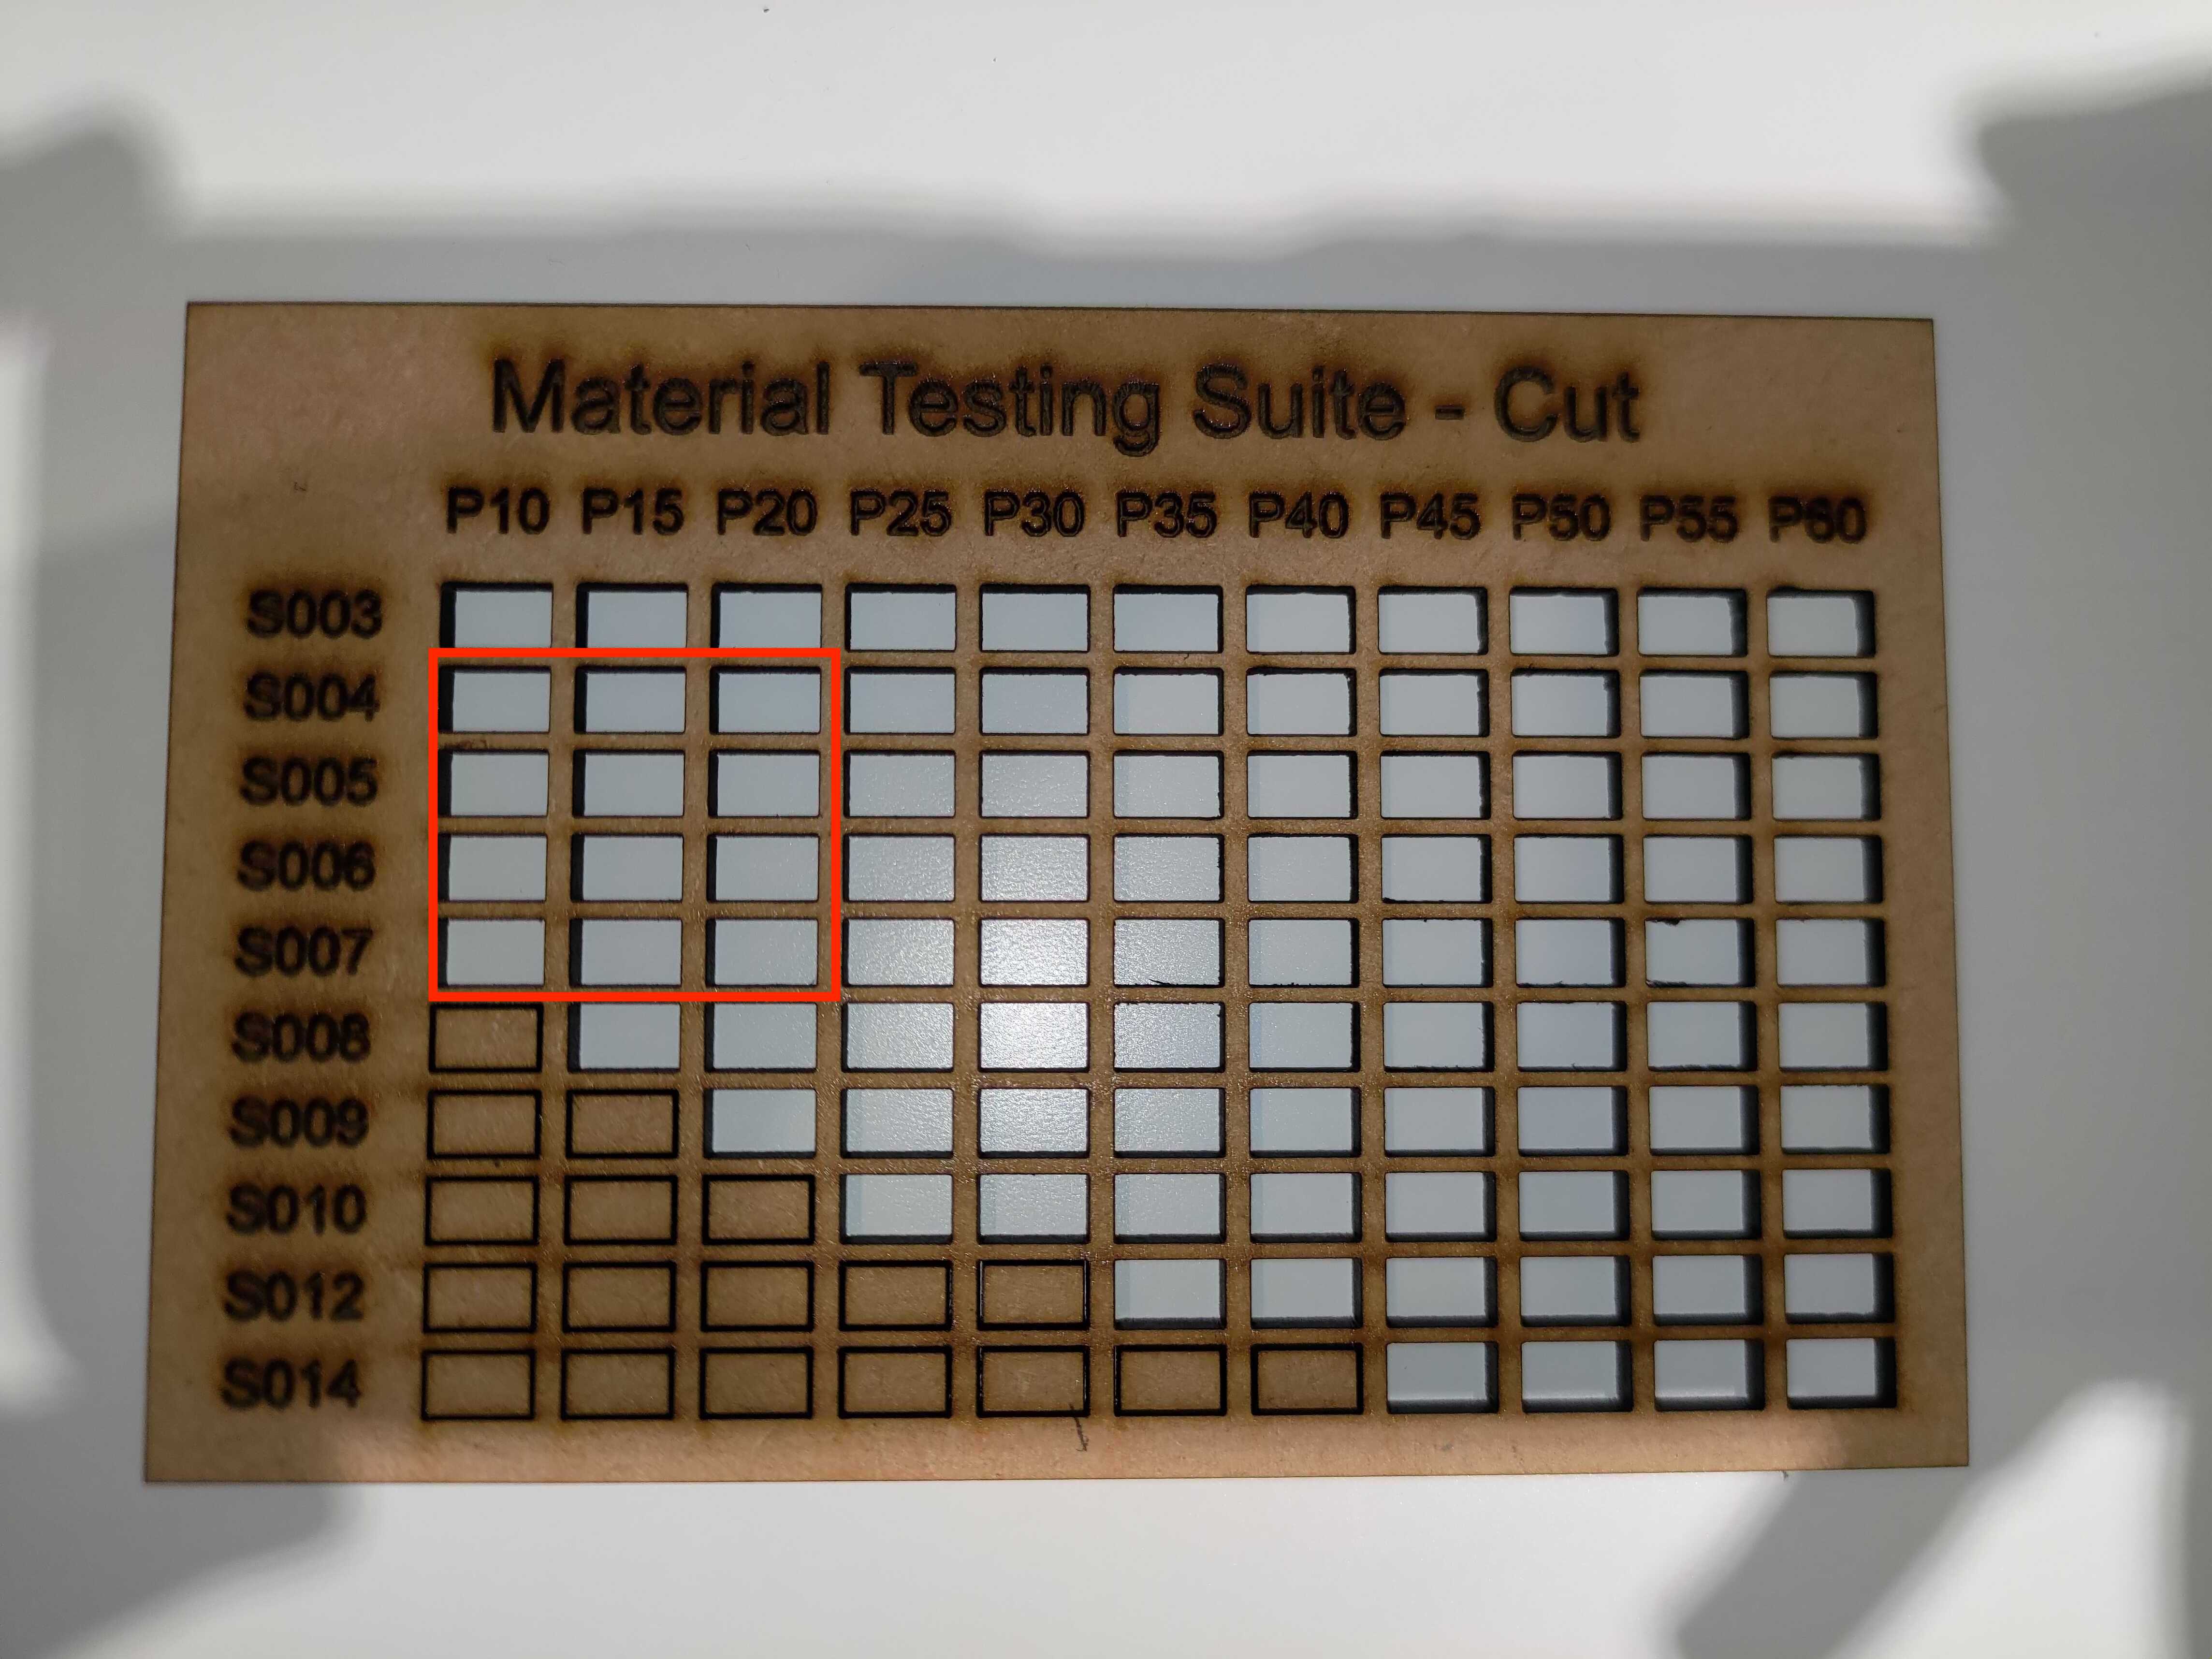
1. No laser output at low power rates of around 10%.
2. The laser output is too strong at low power rates. (Engraving result is too dark or becomes cutting...etc.)
Power Curve Adjustment:
1.
This function is only available in firmware version, 4.0.14 or above. (Where to download?)
After updating the firmware, it can be found on the panel.
(Machine >> Hardware Setting >> Next page >> Power Curve Adjust)
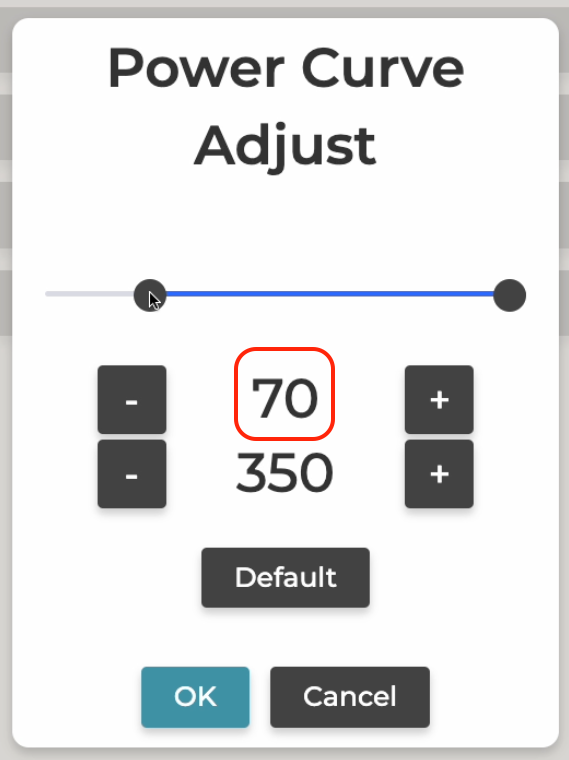
2.
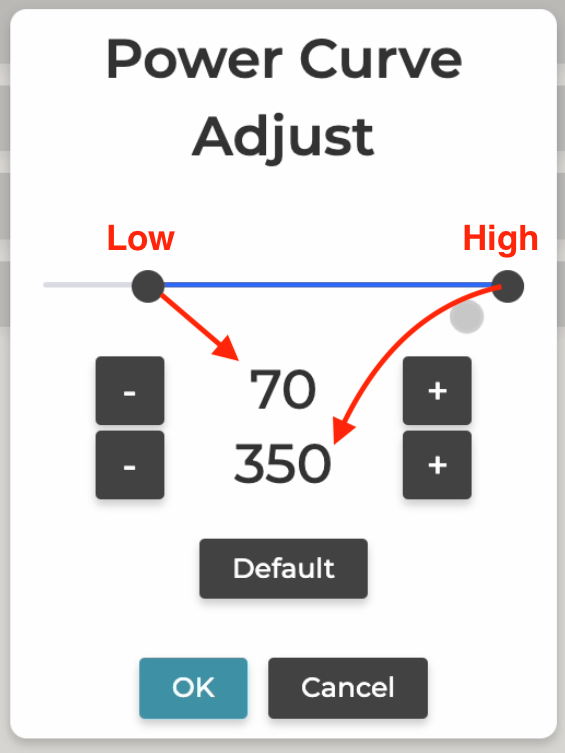
The left section of the lever at 70 controls low power output, while the right section at 350 controls high power output. In general, users would only need to lower or increase the low power section at 70 to prevent failing to output or outputting too strongly at a low power rate.
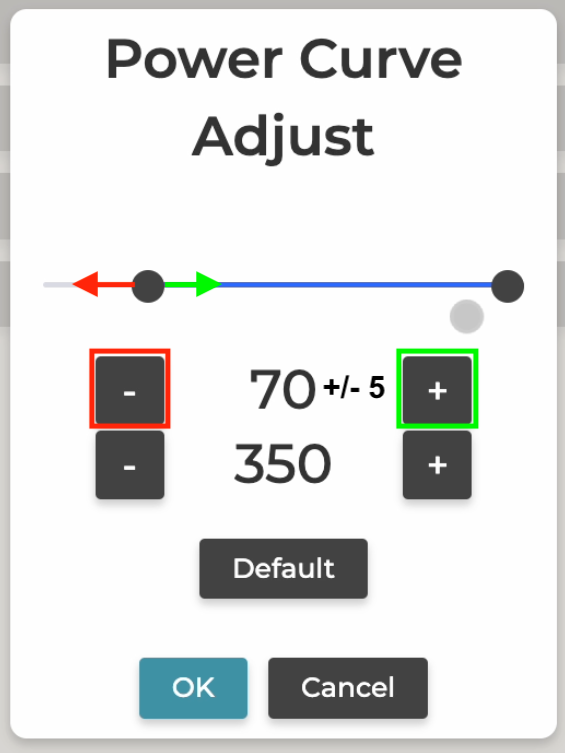
How much needs to be adjusted?
Usually, reducing or increasing "5 points" each time and running a task after to see how the output goes is recommended.
*Note:
- The default setting is 70/350, but your machine might have different parameters than the default.
- DO NOT reset the parameters before adjusting. Please directly reduce or increase them based on the original parameters your machine has.
Example #1:
A.
Your machine is not able to fire at the power rate of 10%.
B.
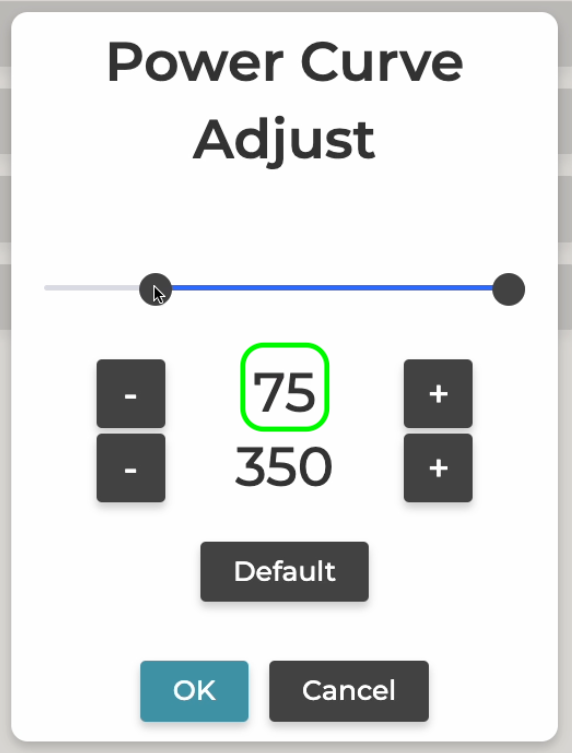
This indicates that the power curve for the low output needs to be increased.
The original value is 70 and adding 5 points each time is suggested, so 70+5 = 75 is the setting.
C.
Run a task with a power rate of 10% and see if the machine fires.
If yes, the problem is solved.
If not, please repeat Step B - Step C to increase another 5 points and run a task again until it fires at the power rate of 10%.
A.
Your machine is not able to fire at the power rate of 10%.
B.
This indicates that the power curve for the low output needs to be increased.
The original value is 70 and adding 5 points each time is suggested, so 70+5 = 75 is the setting.
C.
Run a task with a power rate of 10% and see if the machine fires.
If yes, the problem is solved.
If not, please repeat Step B - Step C to increase another 5 points and run a task again until it fires at the power rate of 10%.
Example #2:
A.
Your machine is having a problem engraving at the power rate of 10% which is too strong.
B.
This indicates that the power curve for the low output needs to be reduced.
The original value is 75 and reducing 5 points each time is suggested, so 75-5 = 70 is the setting.
C.
Run a task with a power rate of 10% and see if the output is still too strong.
If not, the problem is solved.
If yes, please repeat Step B - Step C to reduce another 5 points and run a task again until the result becomes acceptable.
#END
Comments
0 comments
Please sign in to leave a comment.